Building an open-source alternative to LinkTree with Astro, Upstash and GitHub
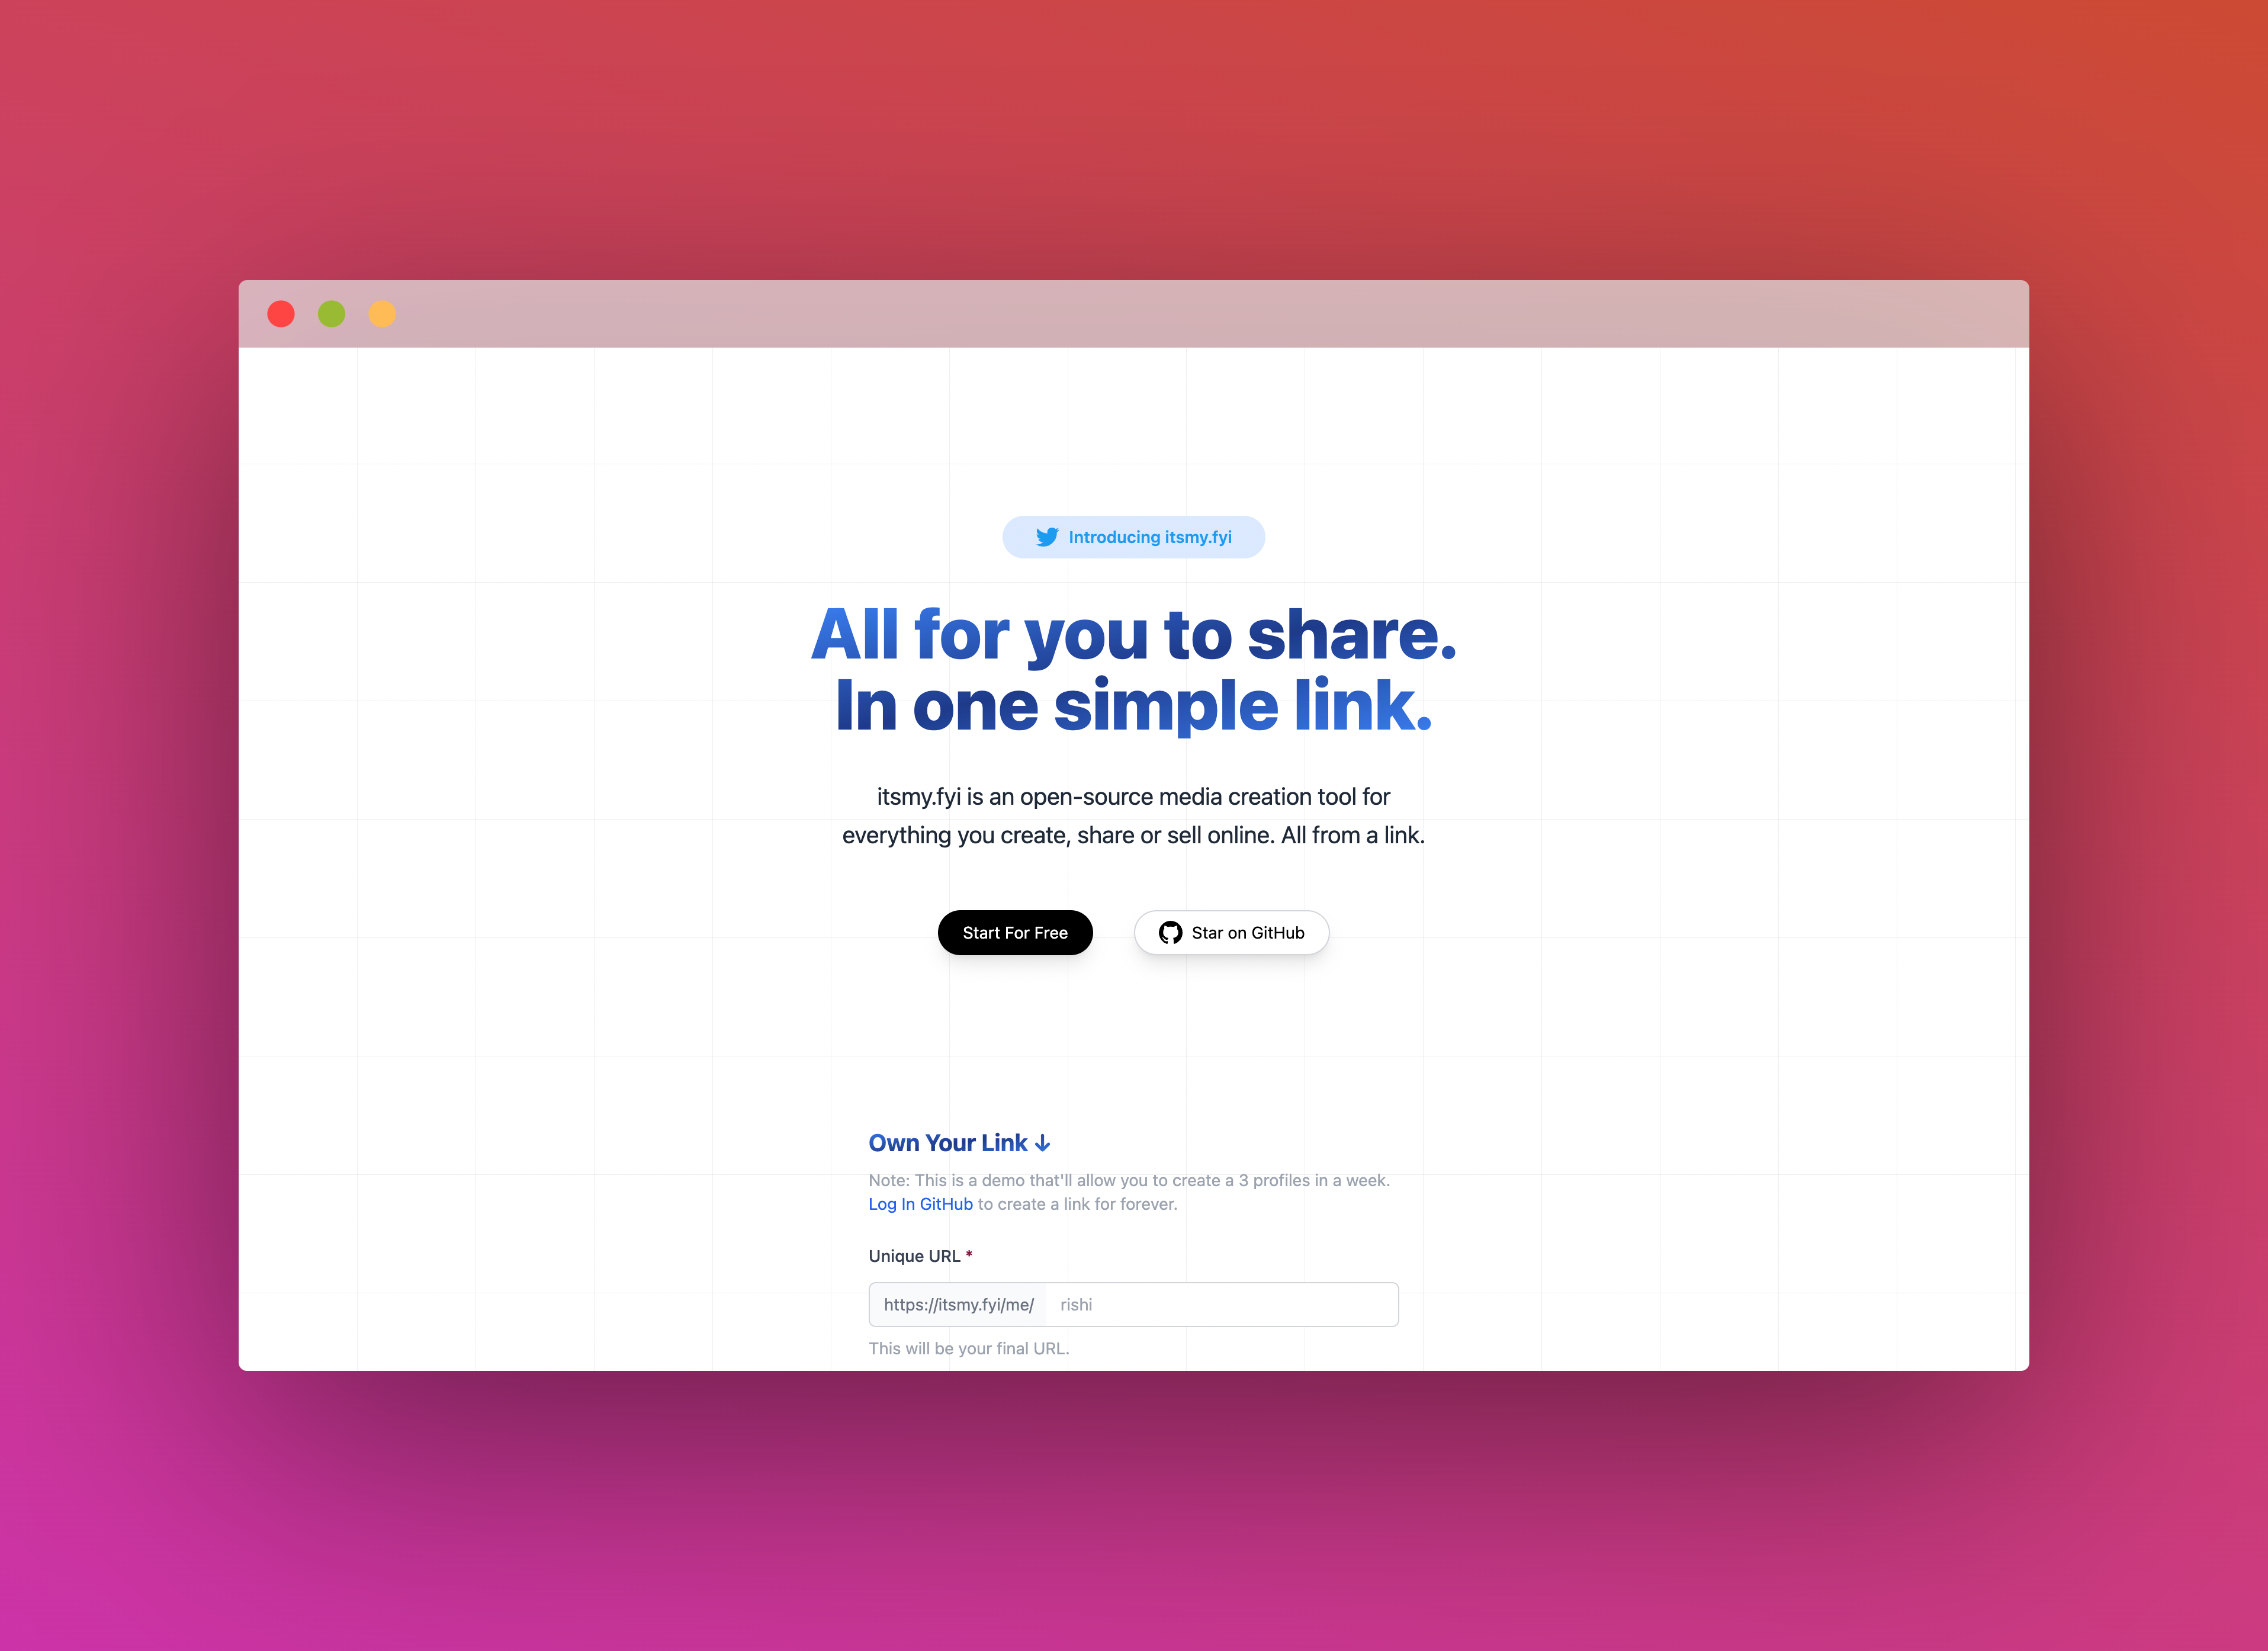
In this post, I talk about how itsmy.fyi (an open-source alternative to LinkTree) is built with Upstash, Astro, GitHub and Edgio. Upstash helped me to manage (CRUD) data of all the users, offered way generous rate limiting as compared to GitHub API for CRUD operations, and implemening granular rate limiting.
What we’ll be using
- Astro (Front-end and Back-end)
- Upstash (Rate Limiting & CRUD Operations)
- GitHub Issue & Webhooks (Public CMS to manage user profiles)
- Tailwind CSS (Styling)
- Edgio (Deployment)
What you'll need
Setting up Upstash Redis
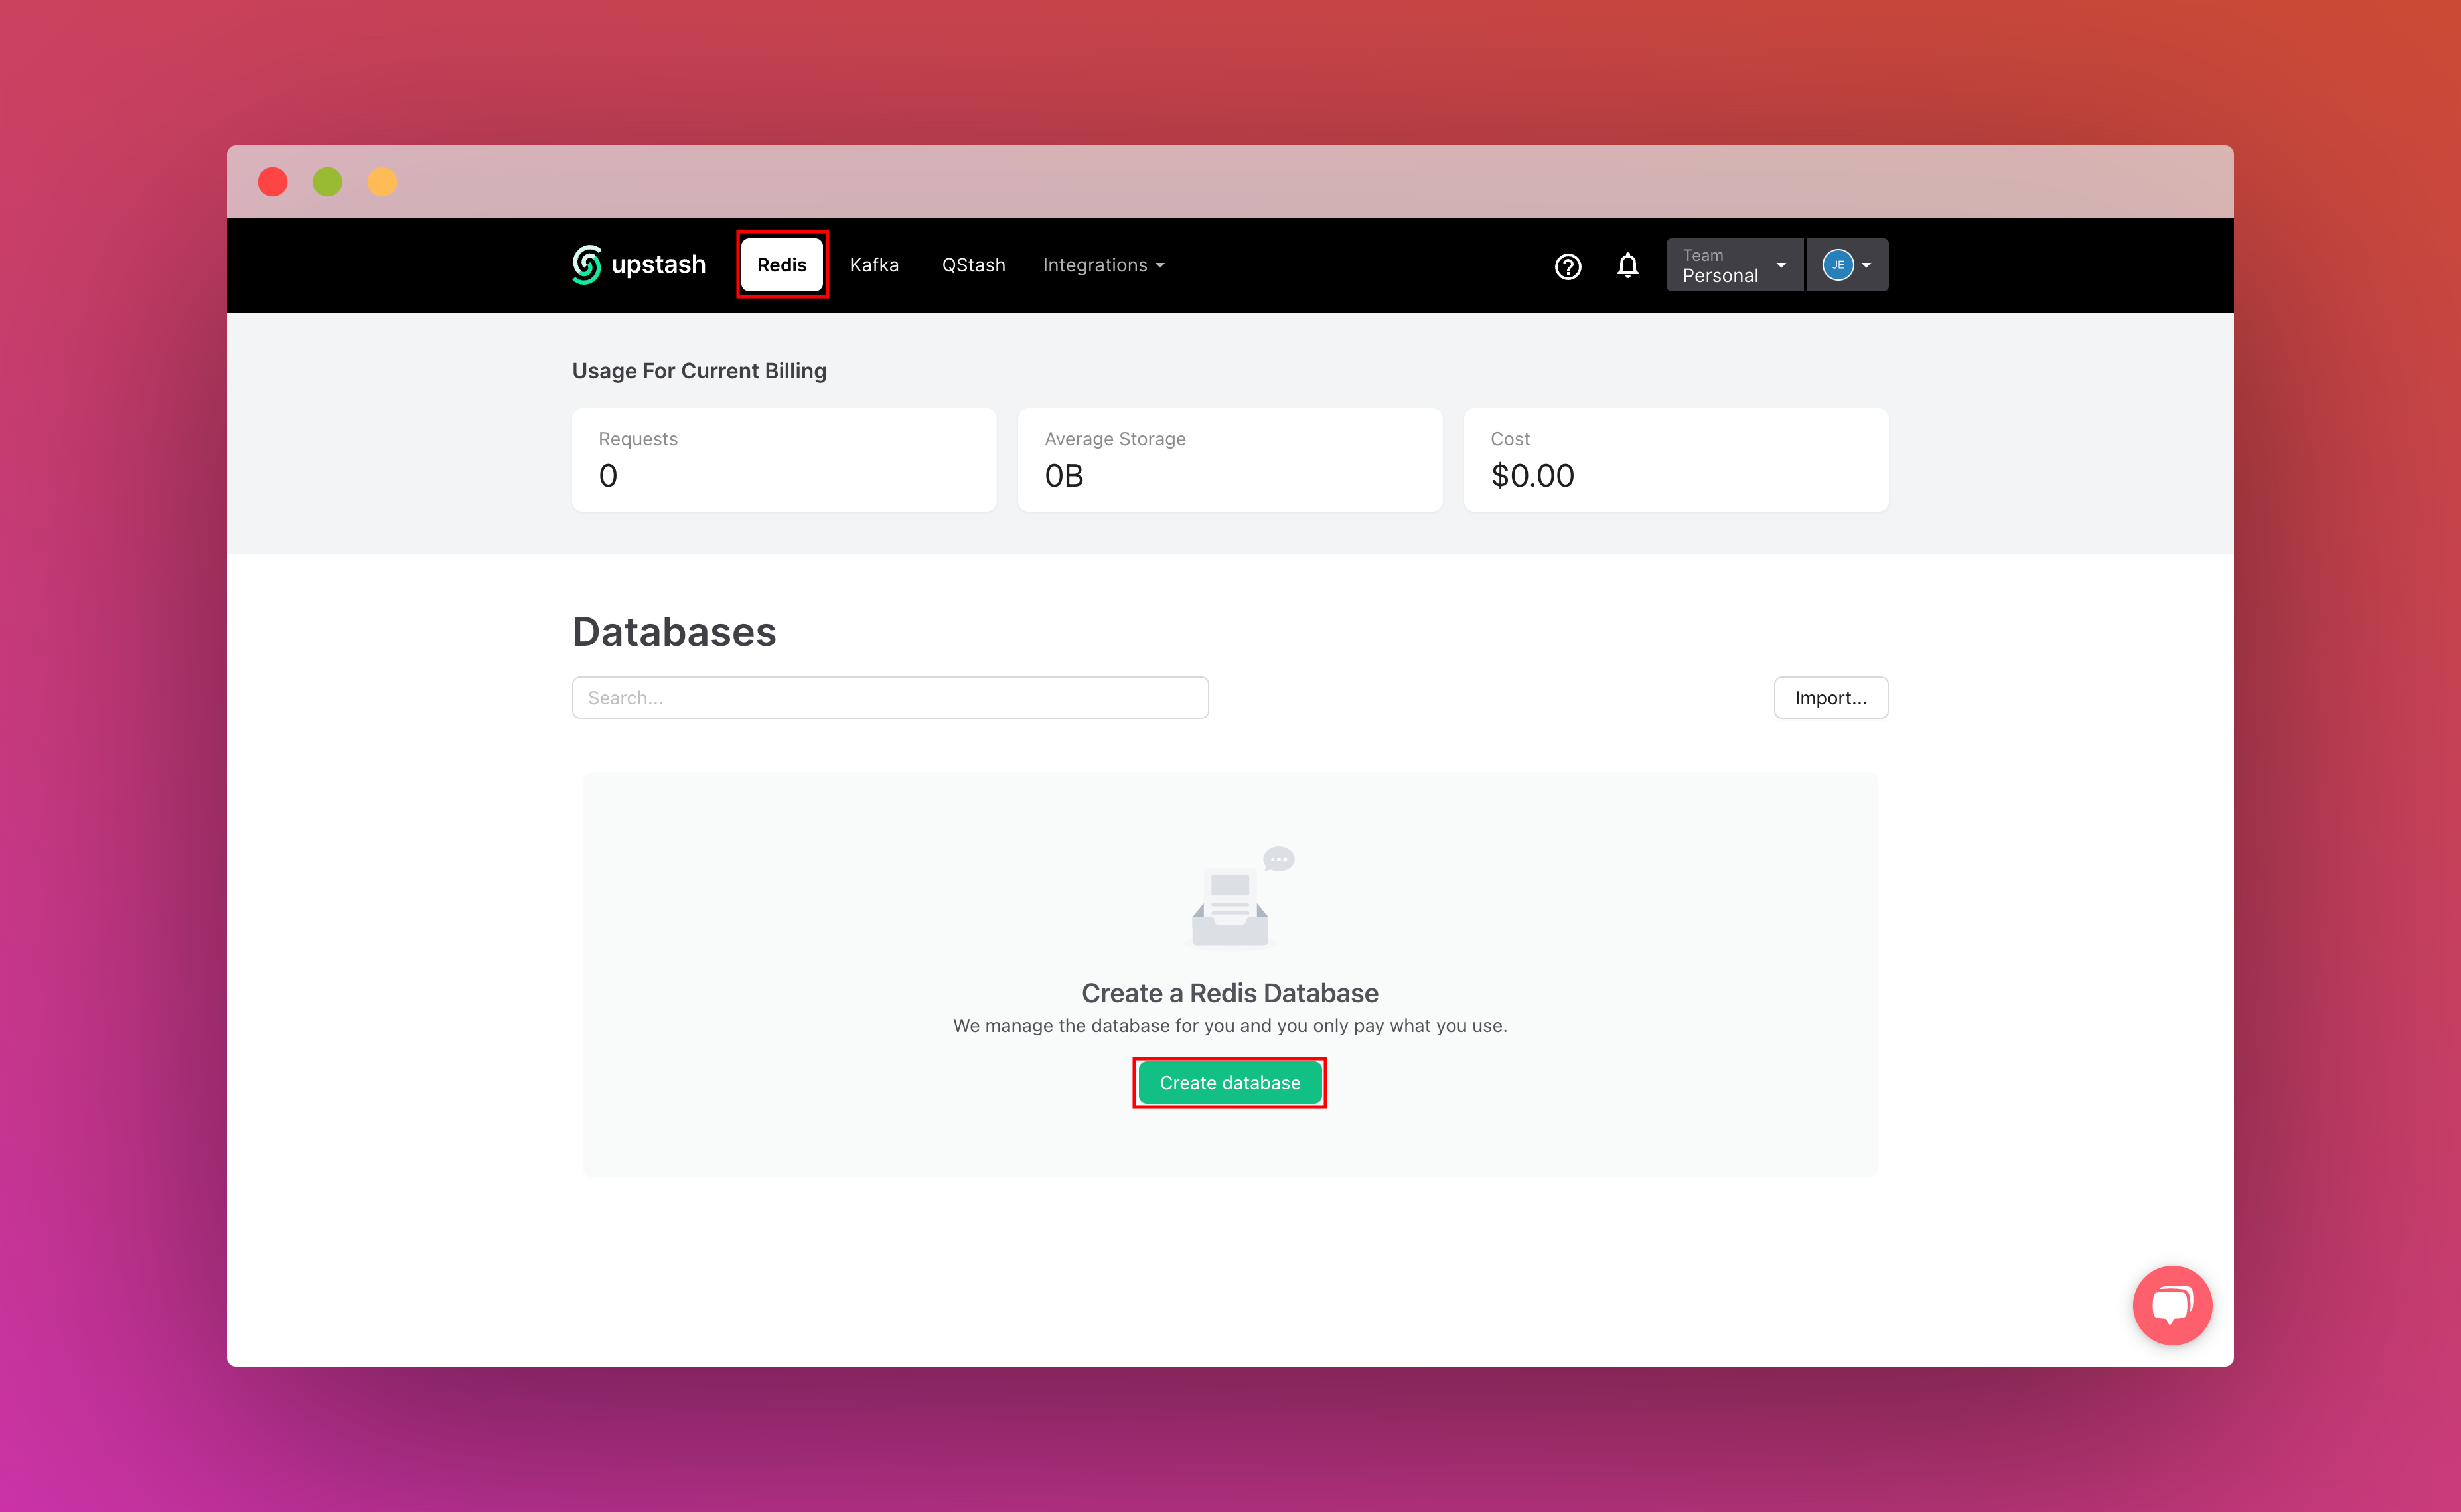
Once you have created an Upstash account and are logged in you are going to go to the Redis tab and create a database.
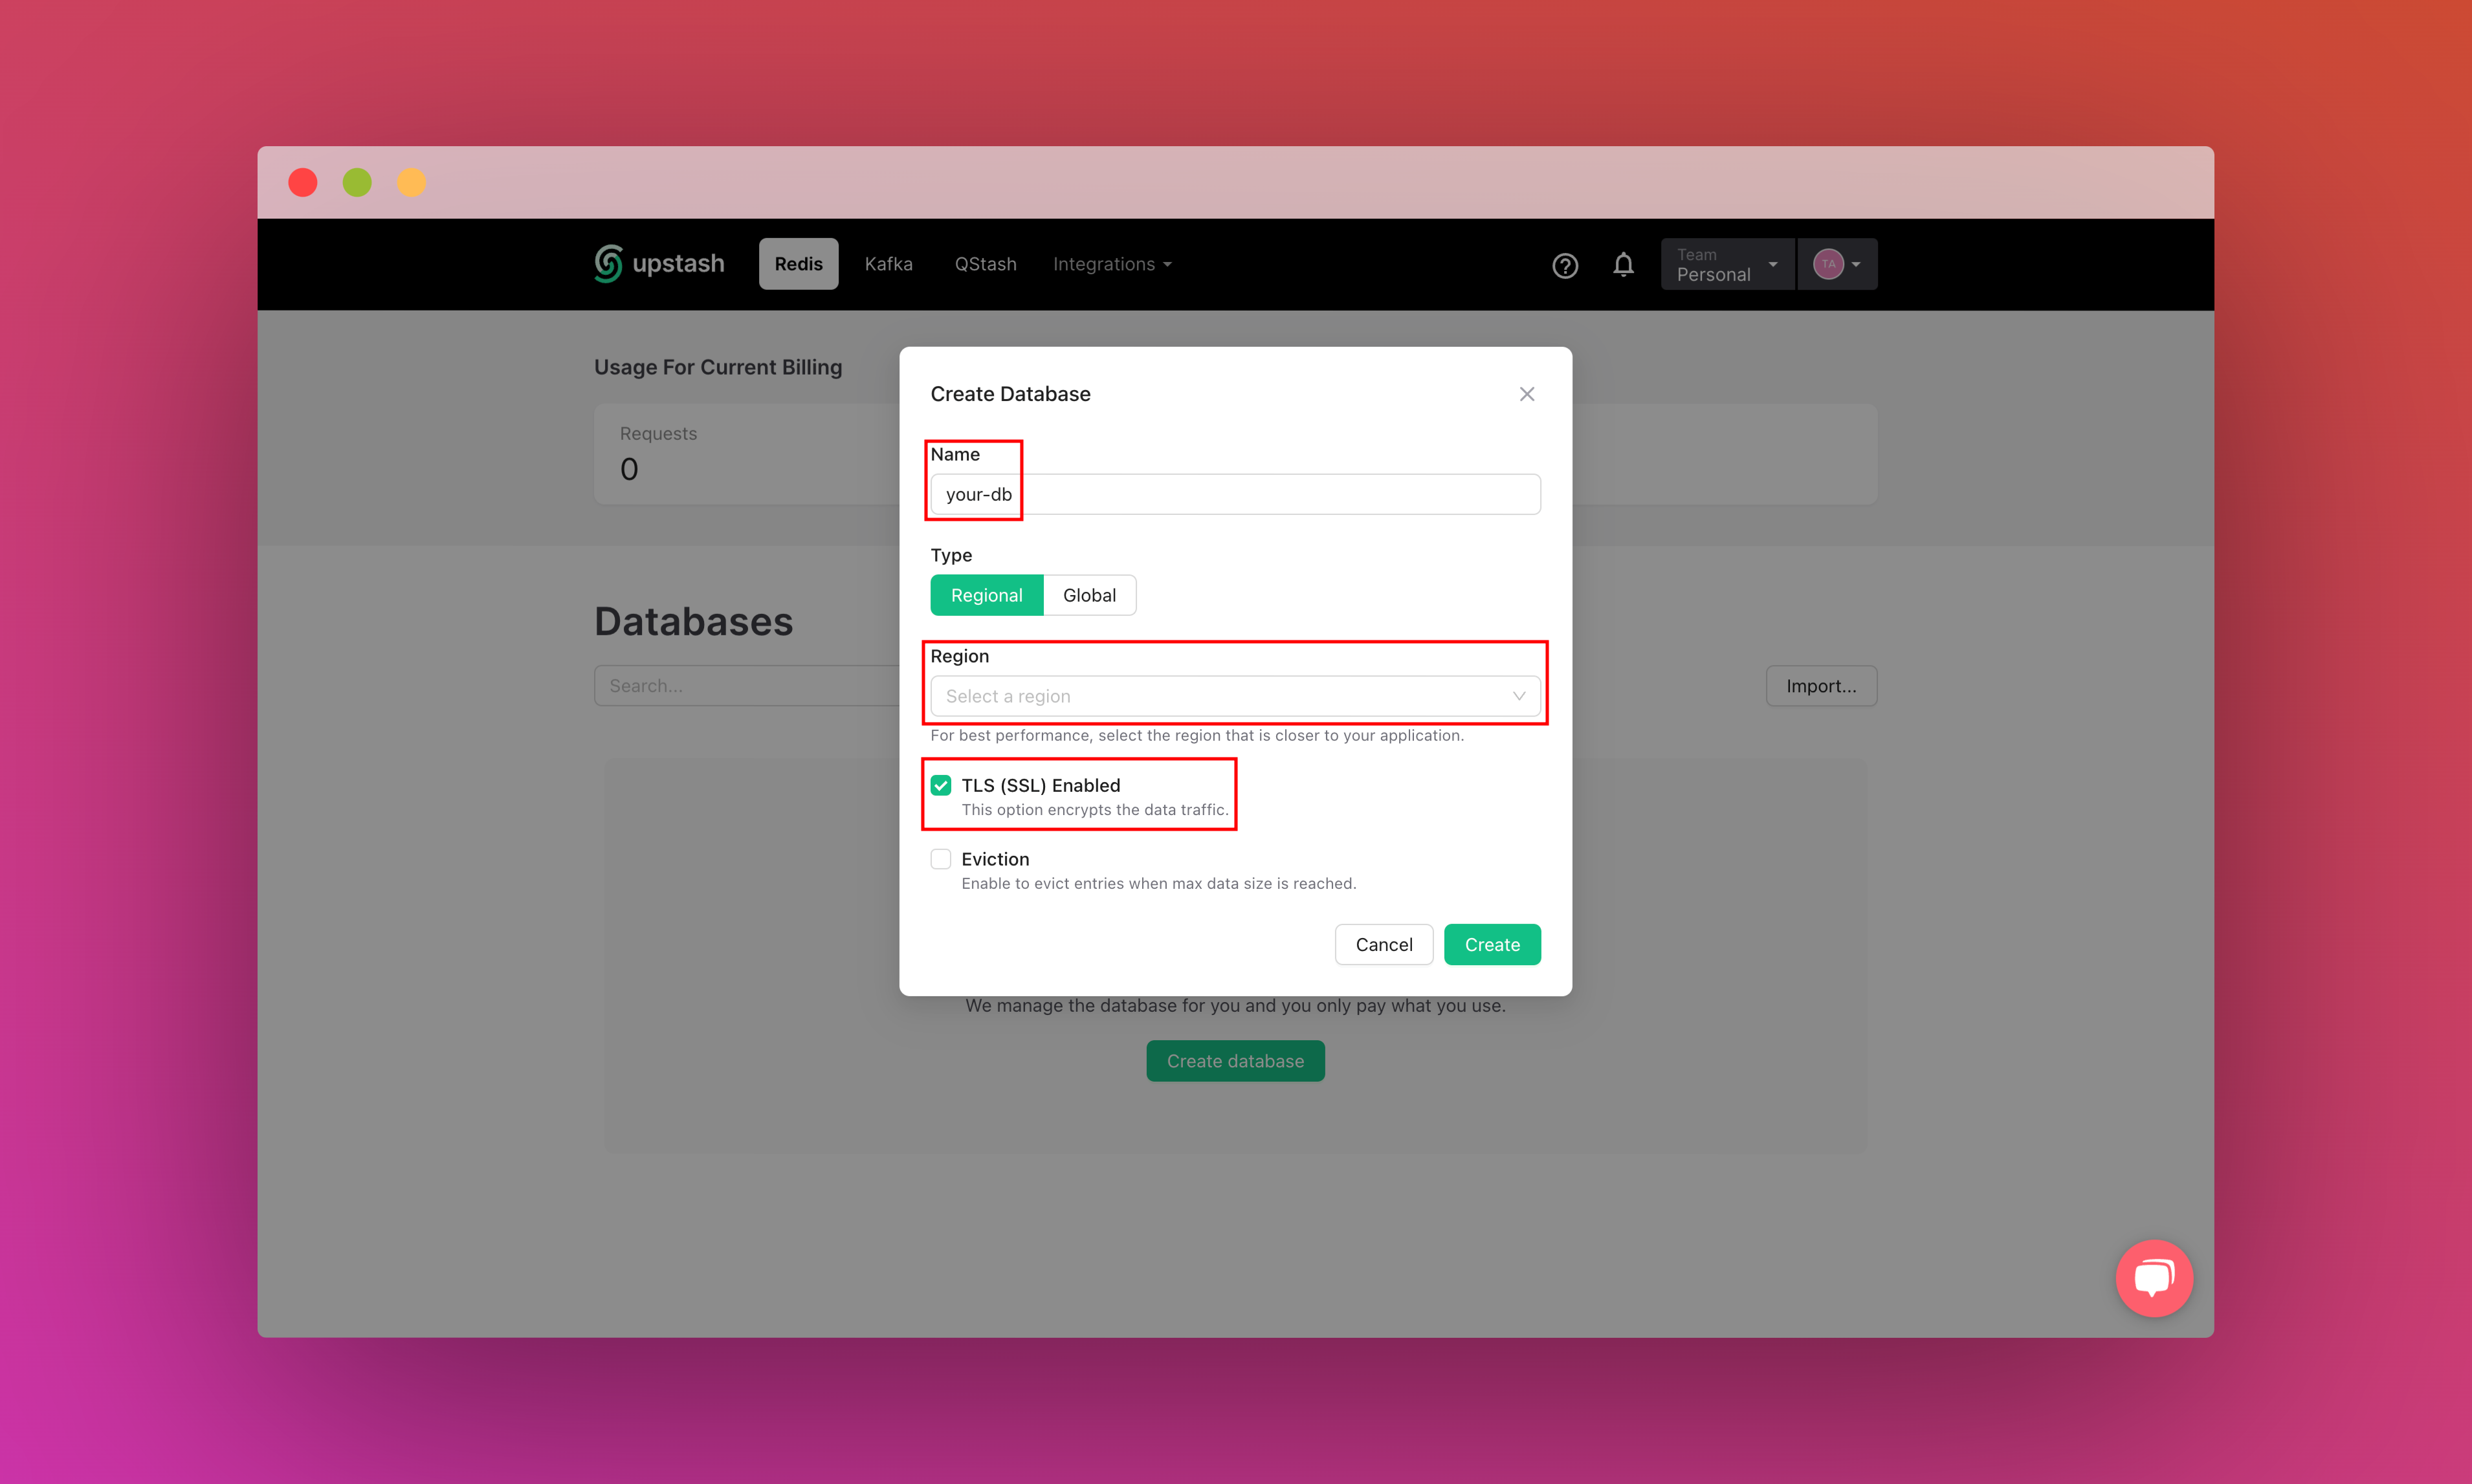
After you have created your database, you are then going to the Details tab.
Scroll down until you find the Connect your database section. Copy the content and save it somewhere safe.
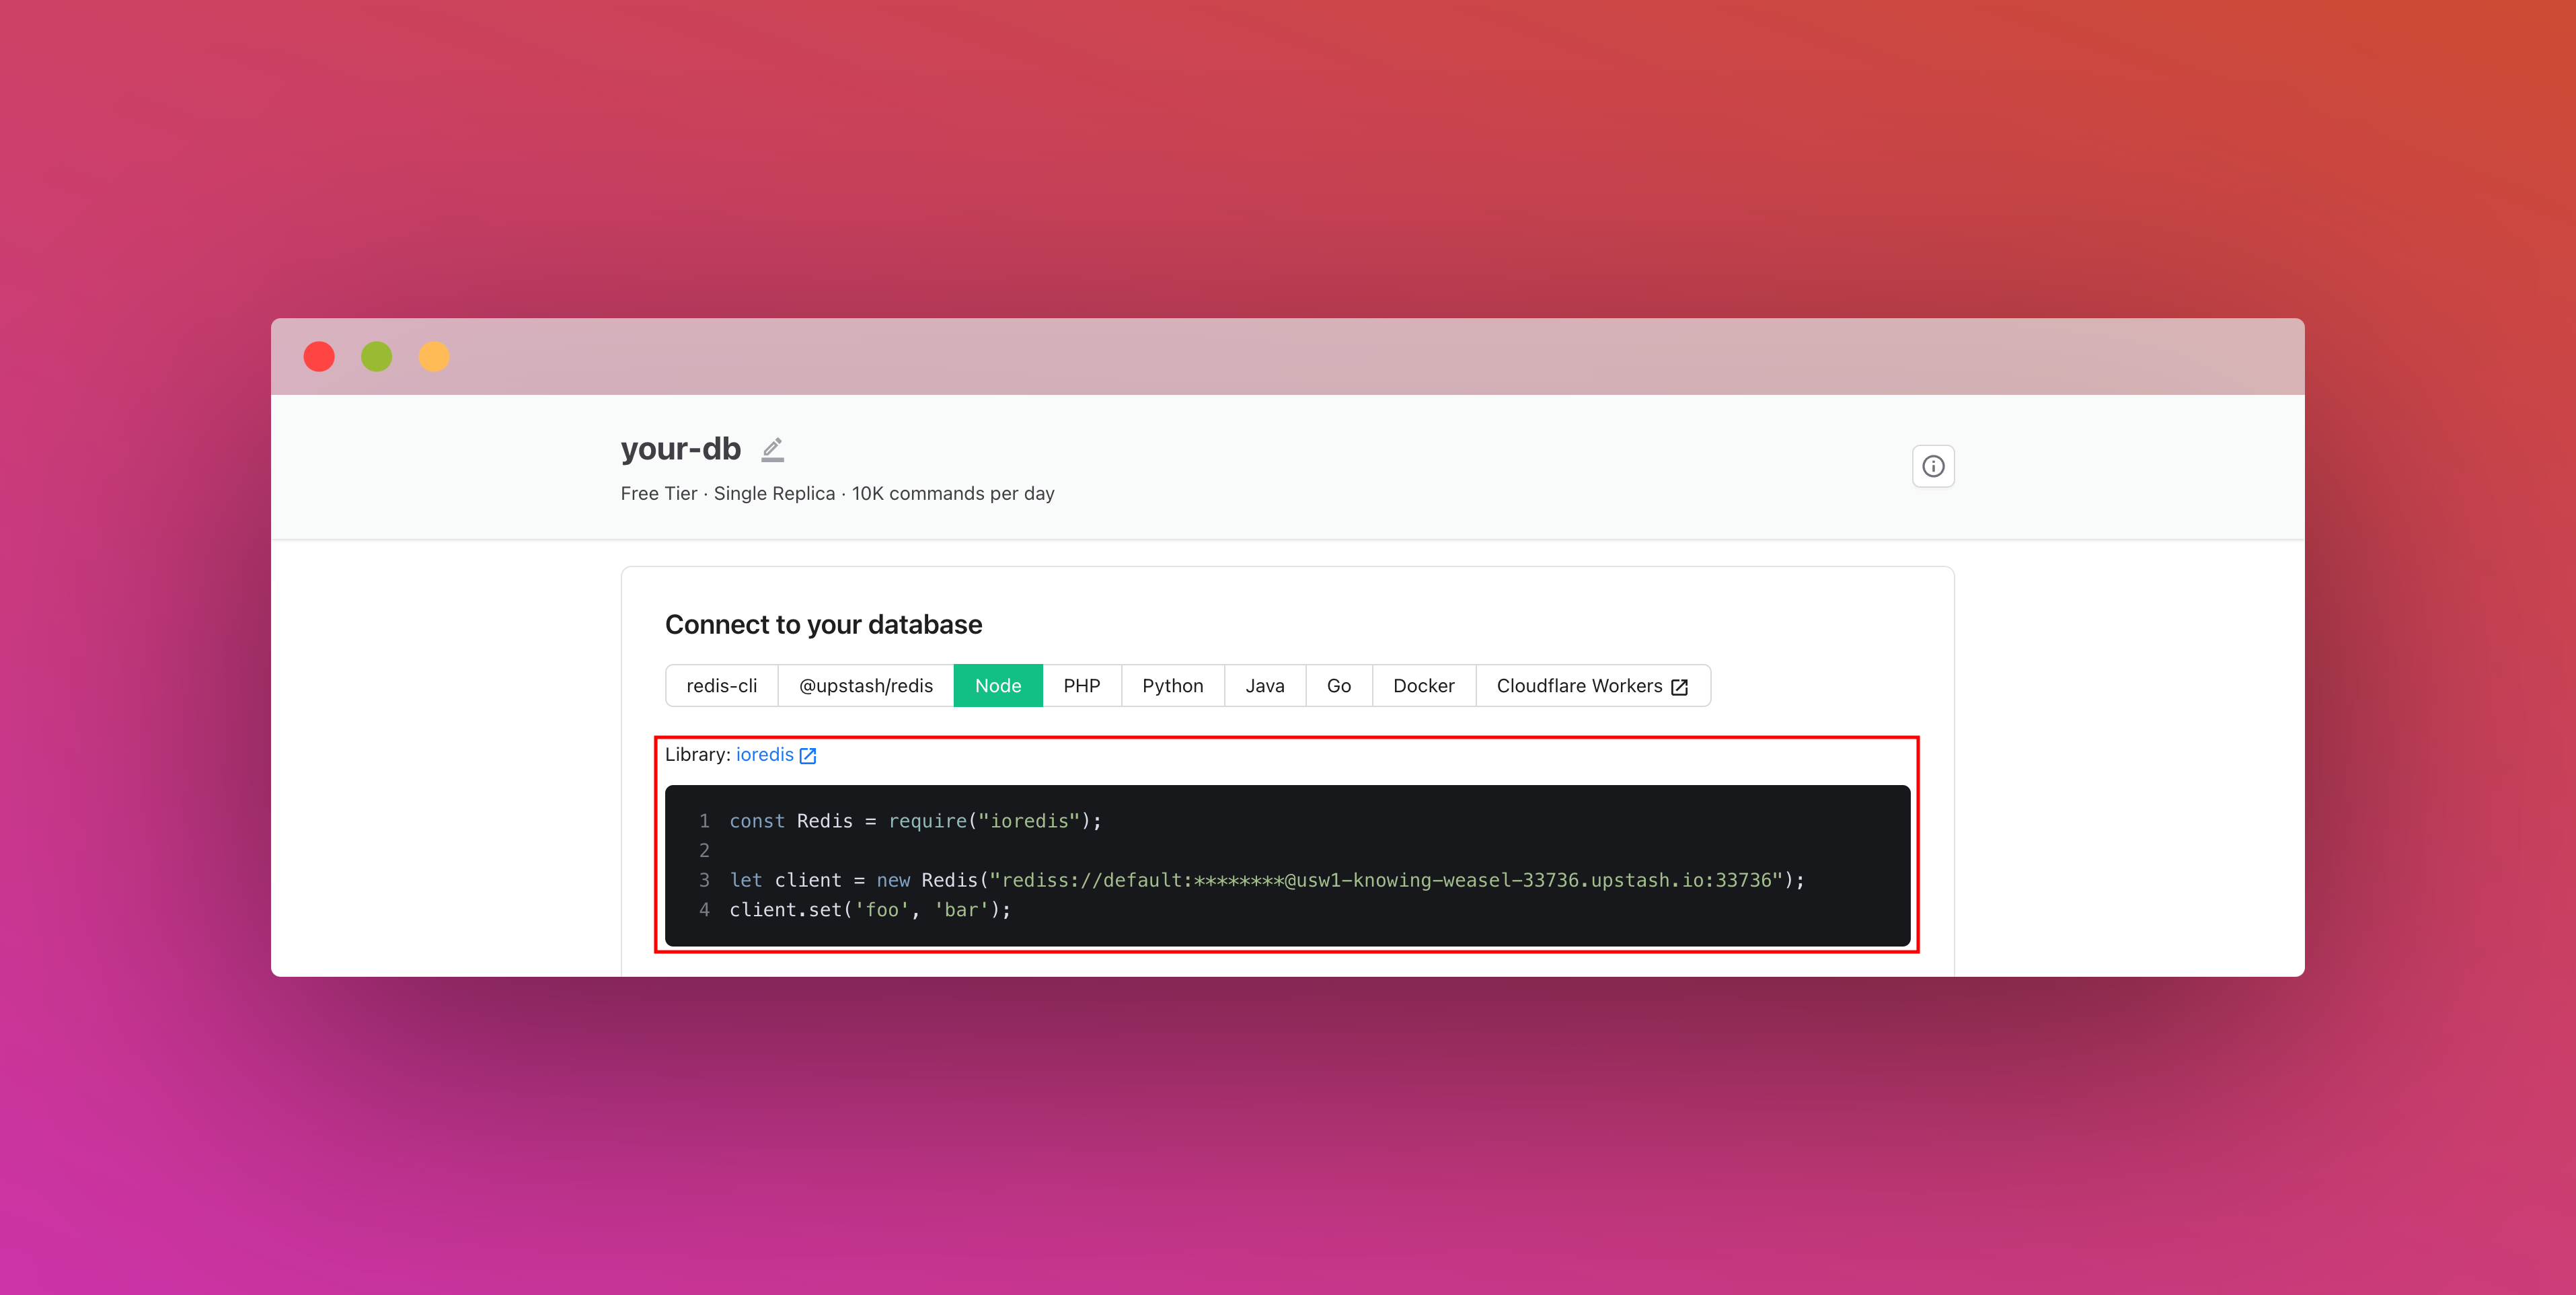
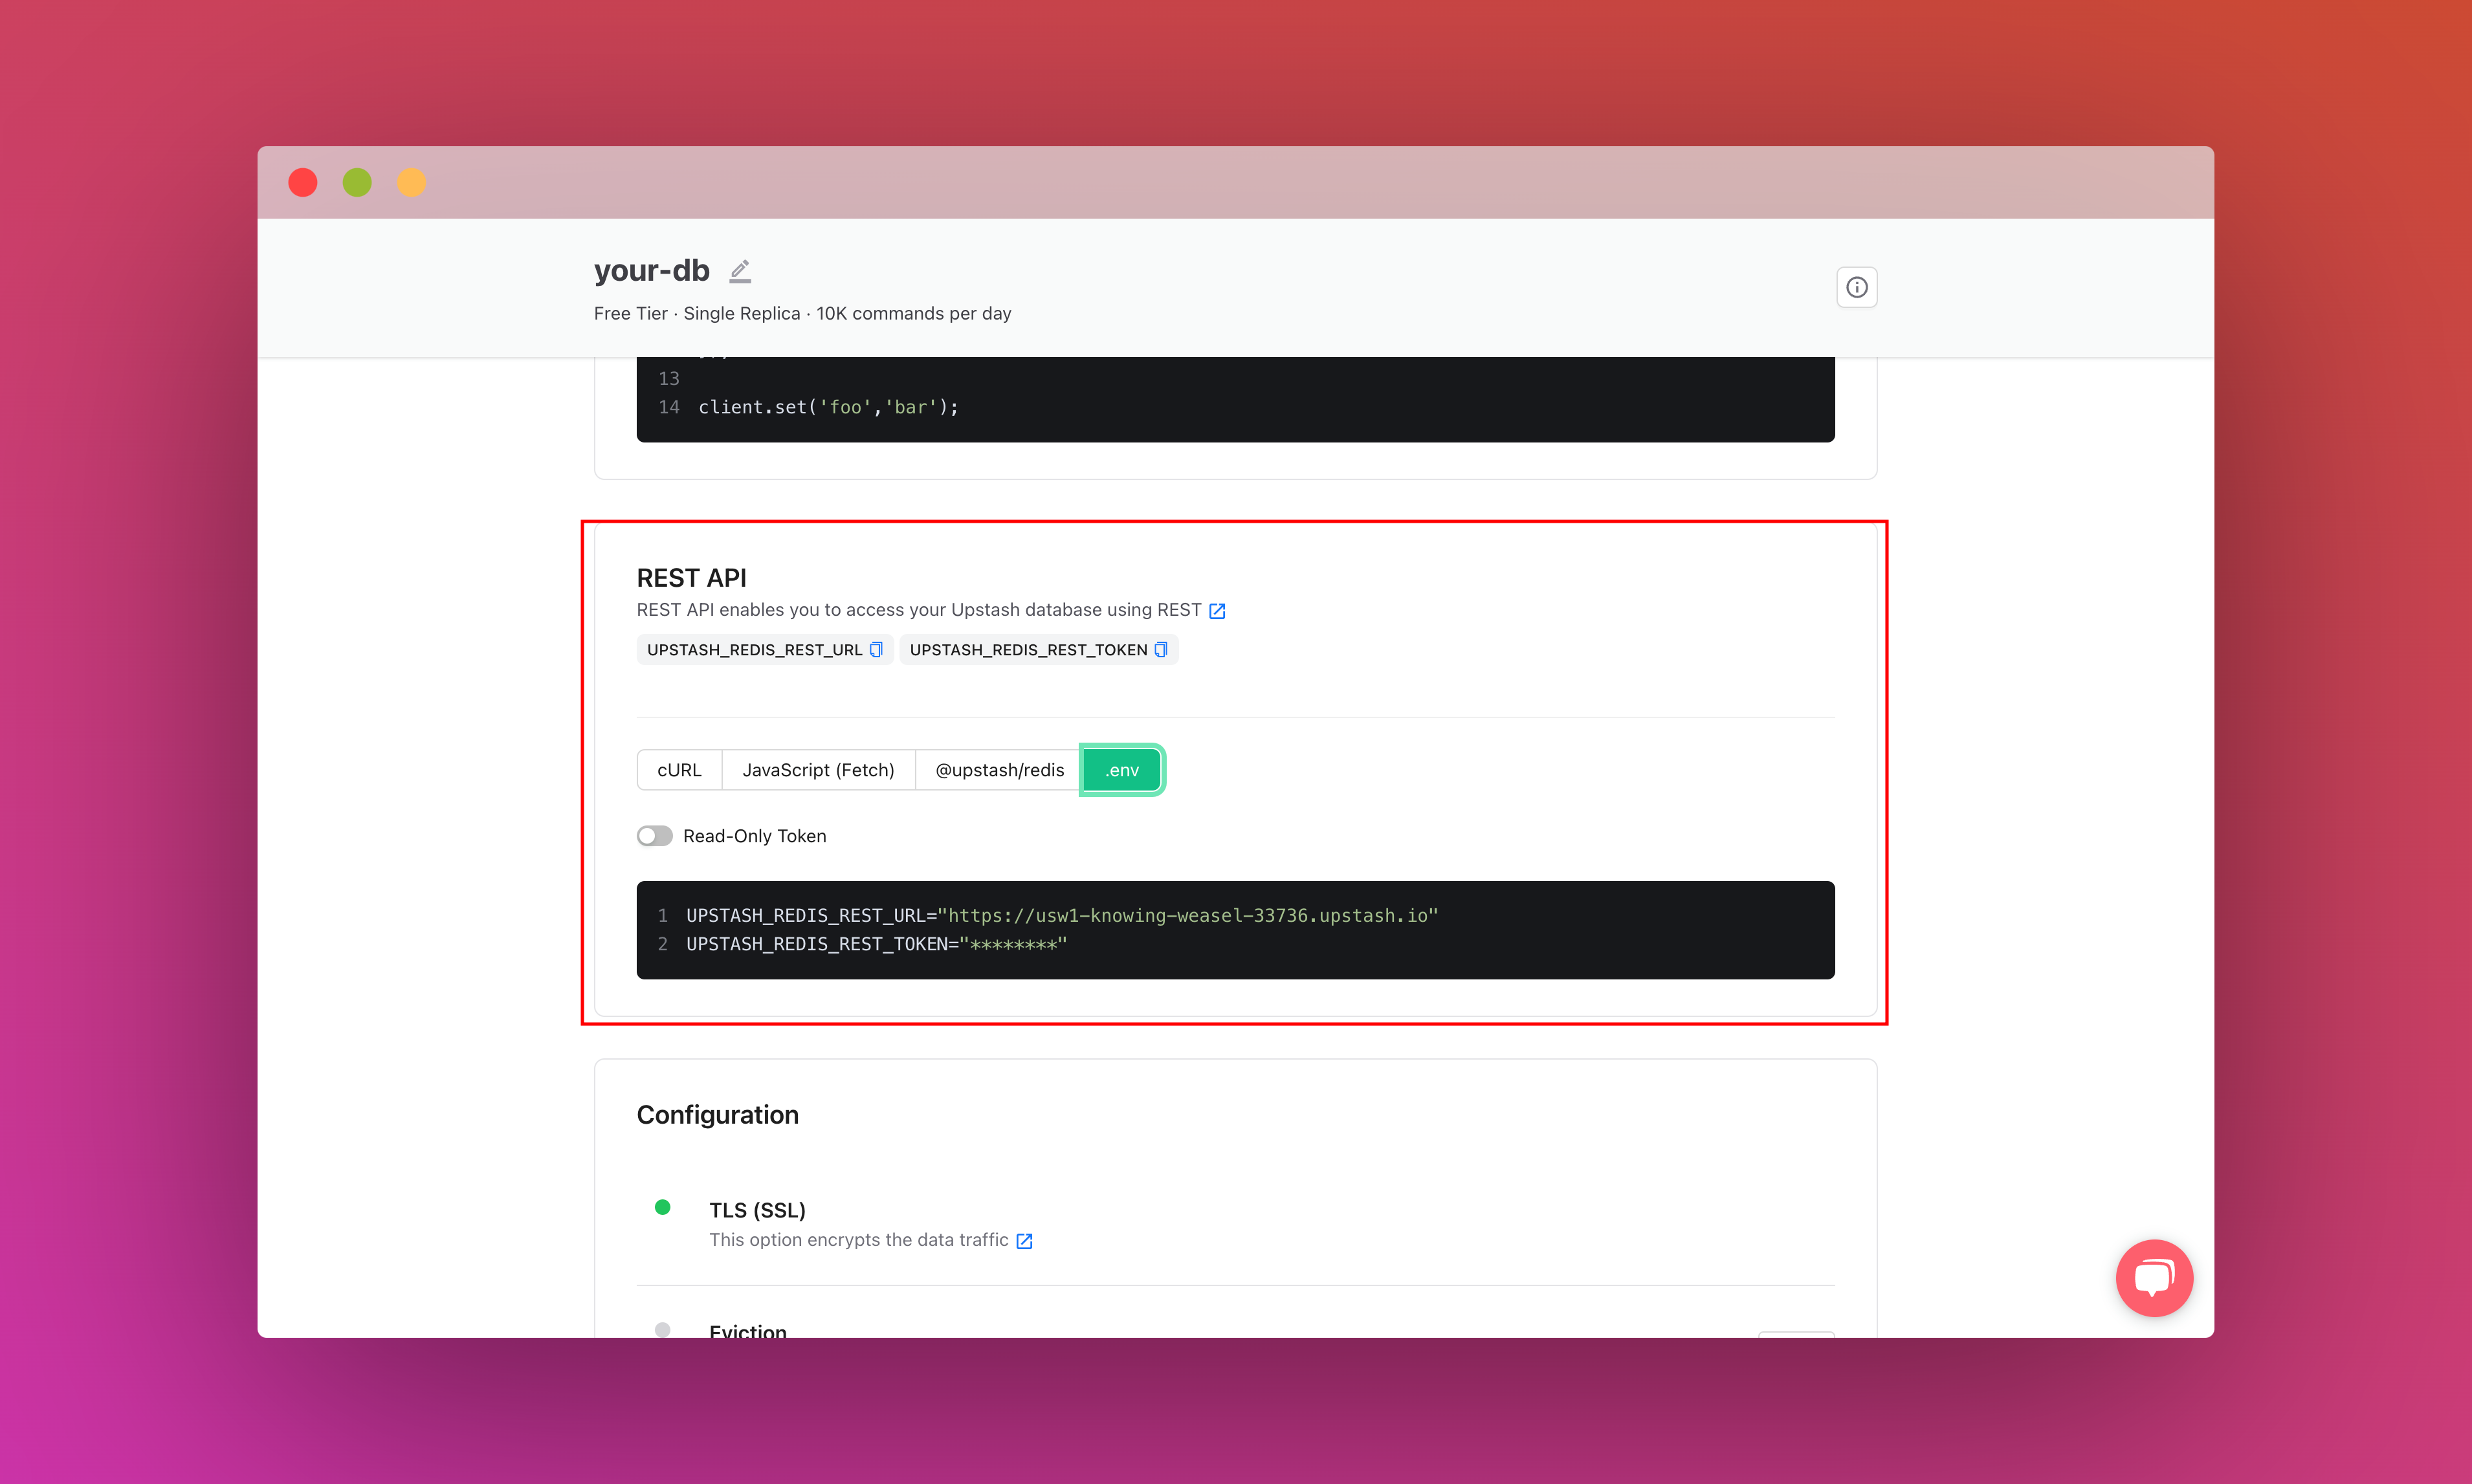
Also, scroll down until you find the REST API section and select the .env button. Copy the content and save it somewhere safe.
Setting up the project
To set up, just clone the app repo and follow this tutorial to learn everything that's in it. To fork the project, run:
git clone https://github.com/rishi-raj-jain/itsmy.fyi
cd itsmy.fyi
yarn install
Once you have cloned the repo, you are going to create a .env file. You are going to add the items we saved from the above sections.
It should look something like this:
# Obtained from your GitHub repo
GITHUB_API_TOKEN="to_create_and_update_github_comments"
GITHUB_WEBHOOK_SECRET="if_you_are_matching_github_webhooks_sha256"

# Obtained from the steps as above
UPSTASH_DB="your_upstash_redis_from_above"
UPSTASH_REDIS_REST_URL="your_upstash_redis_rest__url_from_above"
UPSTASH_REDIS_REST_TOKEN="your_upstash_redis_rest__token_from_above"
After these steps, you should be able to start the local environment using the following command:
yarn run edgio:devRepository Structure
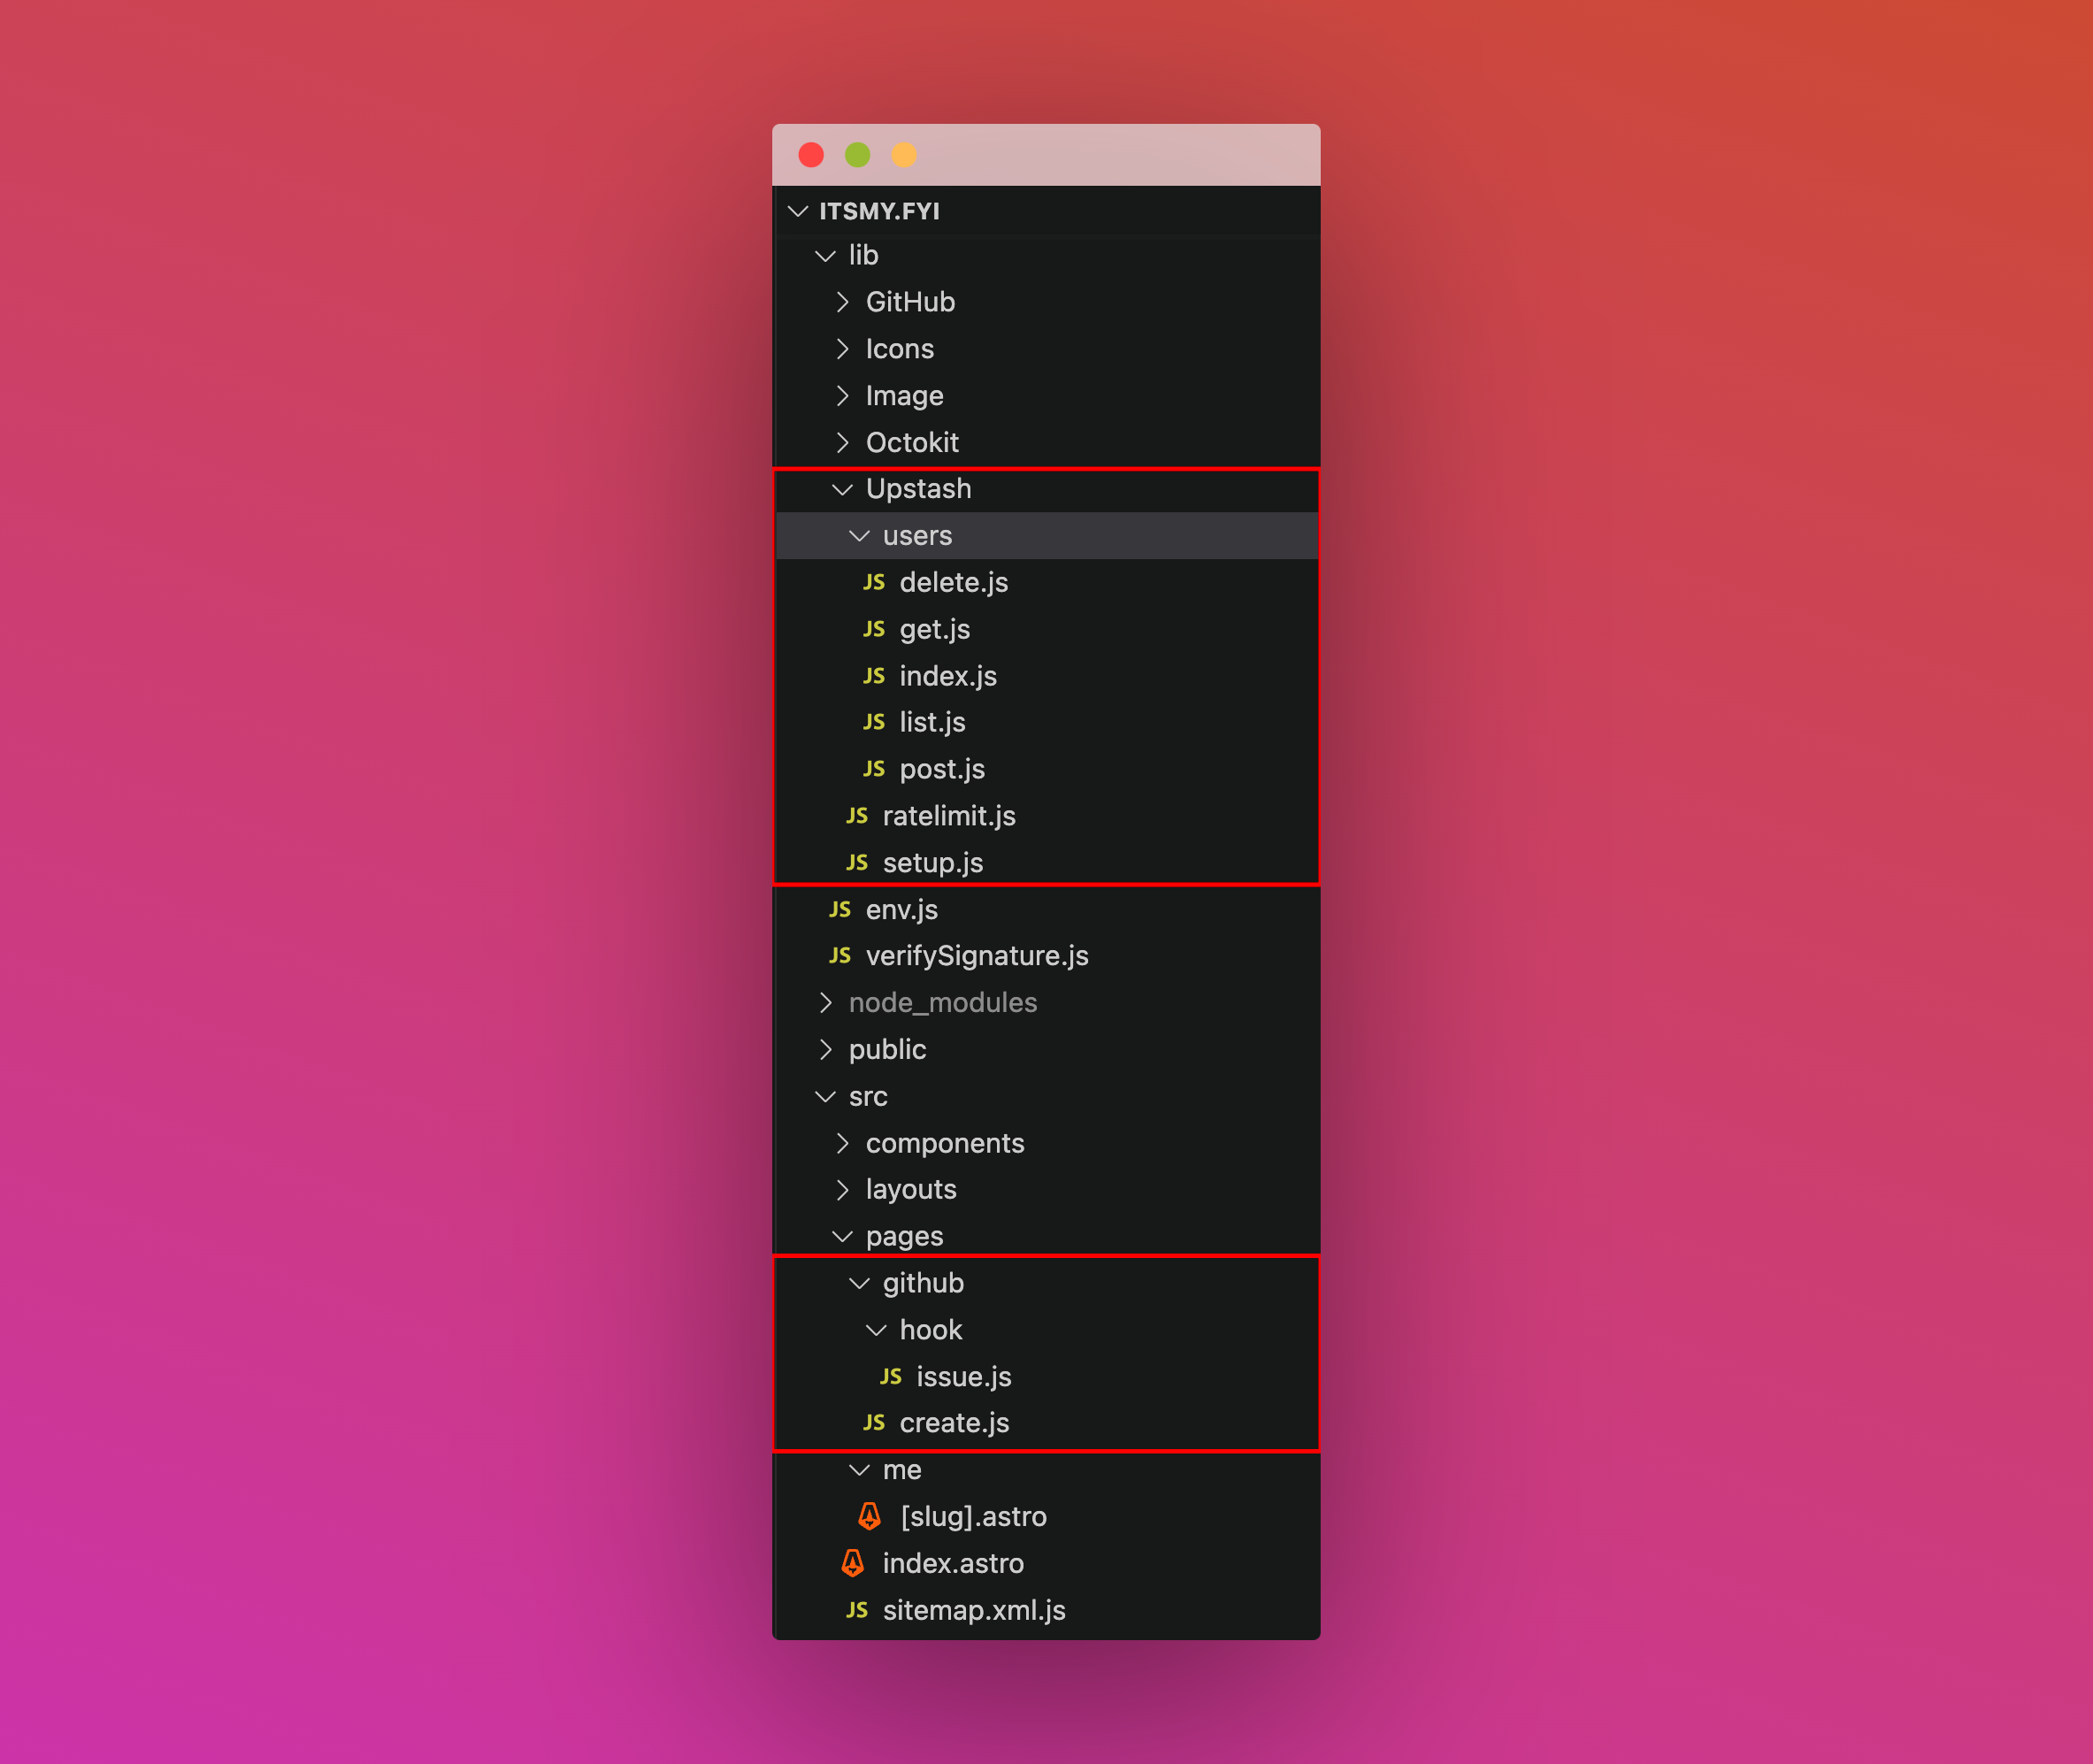
This is the main folder structure for the project. I have circled in red the files that will be discussed further in this post that deals with CRUD Operations, Rate Limiting and the files they are referenced in.
High-Level Data Flow
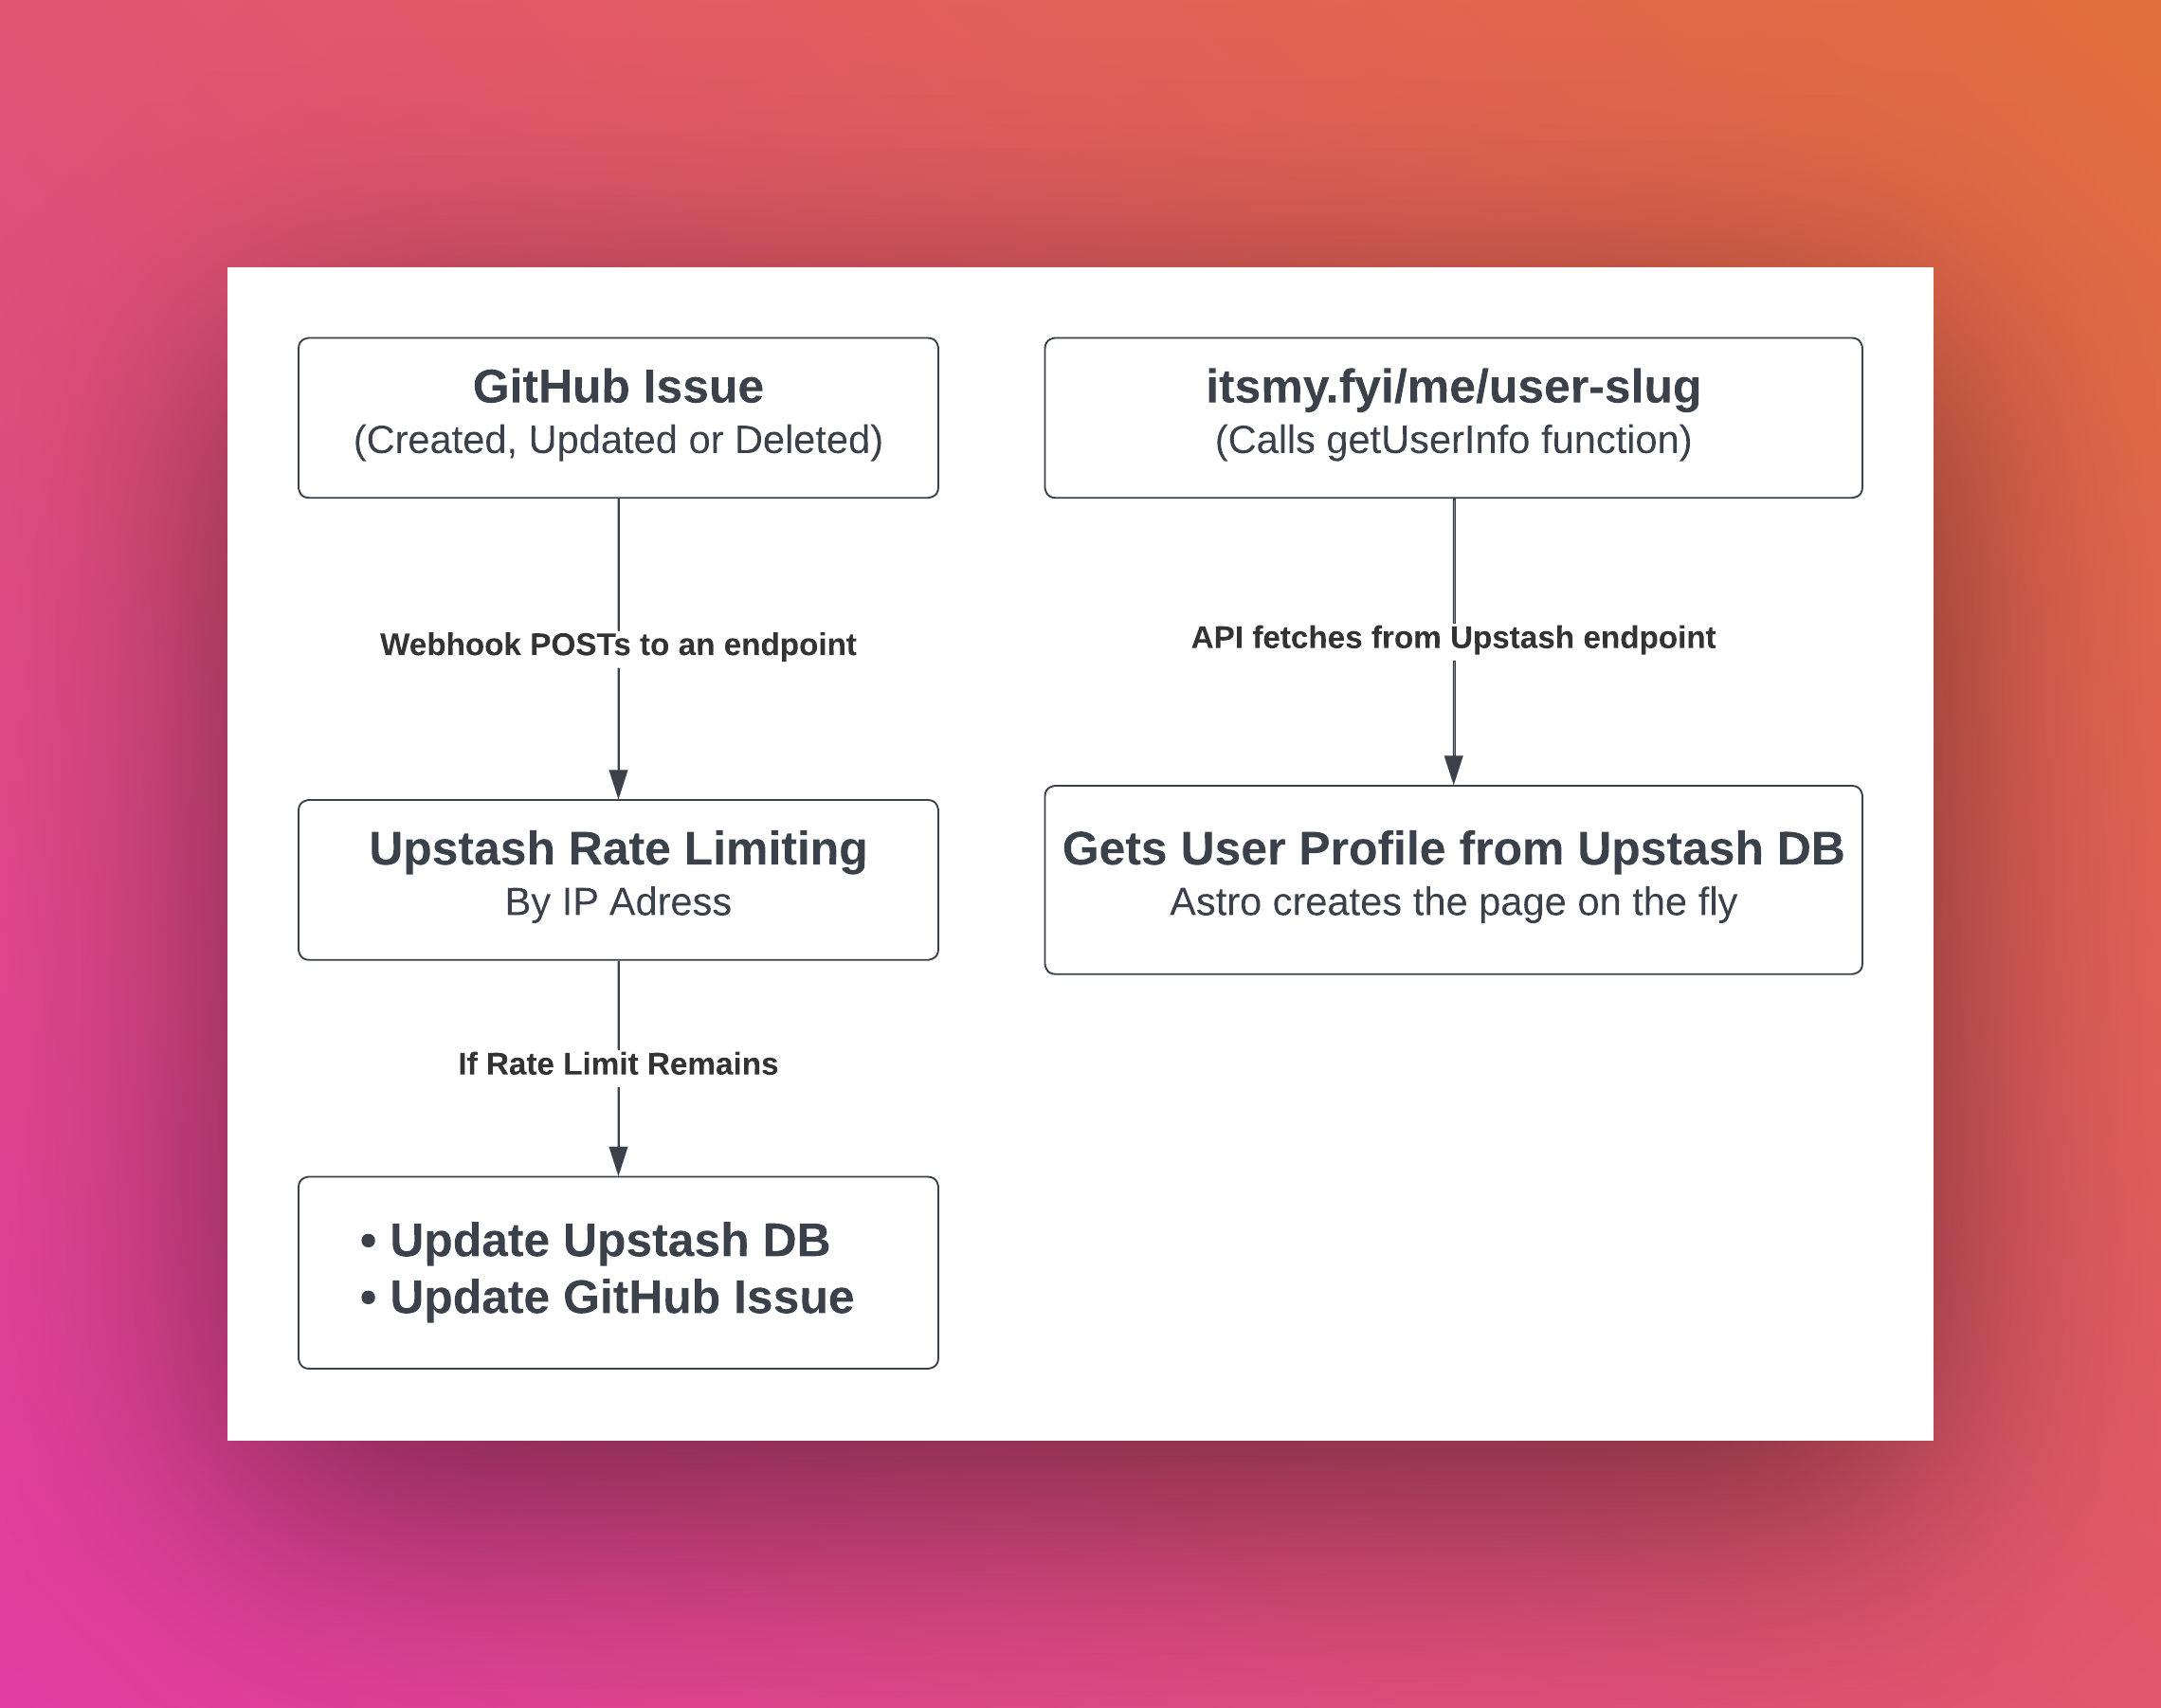
This is a high-level diagram of how data is flowing.
- If a user visits itsmy.fyi/me/slug and the response to this page is not cached (or is being revalidated), it calls the getUserInfo function which in turns retrieves the user json from the Upstash DB
- If a user create(s), update(s) or delete(s) a GitHub Issue, GitHub triggers a Webhook which POSTs to an endpoint. In that endpoint, first Upstash Rate Limiting is used to evaluate if the requested change can be made, and then using Upstash, the user json(s) are created, updated or deleted.
User Profile(s) CRUD Operations via Upstash Redis
In this section, we'll be diving deep into how the data fetching, updating and deletion
for the user profile(s) is done. We make constant use of Upstash (via ioredis) to fetch and display data.
Why I moved over from GitHub to Upstash for CRUD Operations?
While I started out with GitHub as the source of data management: from Github Issues
as data forms to GitHub Webhooks to CRUD user jsons within the repository, the limitations on GitHub REST API: 1,000 requests per hour per repository seemed to restrict and rather regress the intended usage of the platform.
Upstash stood out way better because it offered me 10K commands daily in their free plan to start with, and a very minimal rate thereafter as my usage scaled. This kind of approach allowed me to have a greater user acquisition at a near to no cost, and iterate faster without worrying about scaling and managing costs of the database.
getUserInfo: Fetching the user profile function
The getUserInfo function uses ioredis’s hget via slug as the key to make an API
request to Upstash for the relevant user profile page, identified by a unique slug.
If that user profile is not present (or there is an error), the function is set to
return an object with a { code: 0 } so that then the user can be redirected to
404 automatically in Astro’s dynamic route.
// File: lib/Upstash/users/get.js
// Read User Profile Code

import redis from "../setup";

export async function getUserInfo(slug) {
  try {
    const userData = await redis.hget("profiles", slug);
    const parsedData = JSON.parse(userData);
    if (parsedData.slug === slug) {
      return { ...parsedData, code: 1 };
    }
    return {
      code: 0,
      error: `slug doesn't match for the user.`,
    };
  } catch (e) {
    const error = e.message || e.toString();
    console.log(error);
    return {
      code: 0,
      error,
    };
  }
}
Similarly, the remaining CRUD operations are as follows:
import redis from "../setup";

// File: @/lib/Upstash/users/delete.js
// Delete User Profile Code
export async function deleteUserInfo(slug) {
  try {
    await redis.hdel("profiles", slug);
    return { code: 1 };
  } catch (e) {
    console.log(e.message || e.toString());
    return {
      code: 0,
    };
  }
}

// File: @/lib/Upstash/users/post.js
// Create/Update User Profile Code
export async function postUserInfo(data) {
  try {
    await redis.hset("profiles", data.slug, JSON.stringify(data));
    return { code: 1 };
  } catch (e) {
    const error = e.message || e.toString();
    console.log(error);
    return {
      code: 0,
      error,
    };
  }
}
Rate Limiting
To implement rate-limiting in serverless environments with Edgio,
we use Upstash Redis database client and a rate limiter library called @upstash/ratelimit.
// Reference Function to ratelimiting

import { Ratelimit } from "@upstash/ratelimit";
import { Redis } from "@upstash/redis";

import { getENV } from "@/lib/env";

const url = getENV("UPSTASH_REDIS_REST_URL");
const token = getENV("UPSTASH_REDIS_REST_TOKEN");

export const ratelimit = (number, time) => {
  if (url && token) {
    return new Ratelimit({
      redis: new Redis({
        url,
        token,
      }),
      limiter: Ratelimit.fixedWindow(number, time),
    });
  }
  return;
};
Using Rate Limiting, I was able to achieve the following:
A. Make the use of service - totally free & unlimited
Using Rate Limiting, I am able to expose the profile creation API publicly! This allowed me to showcase the benefits of the system i.e. ease of setup of a profile via GUI. Literally anyone can create 3 profiles in a week via the website (itsmy.fyi) itself, and for unlimited access to features such as edit profile, create unlimited profiles, users are to switch to GitHub way of creating profile. We’re able to enforce the rate limit of 3 profiles in a week based on IP address as the key.
// Rate limit 3 profiles in a week via the web for a user
const ratelimitUser = ratelimit(3, 7 * 24 * 60 * 60 + " s");

if (rateLimiter) {
  // Look at the x-0-client-ip set by Edgio in serverless
  const result = await rateLimiter.limit("x-0-client-ip");
  limit = result.limit;
  remaining = result.remaining;
  if (!result.success) {
    // Return a message
  }
}
B. Implement granular moderation to number of edits by a user
Also, via Rate Limiting we’re able to moderate the number of edits made by a user in a minute based on their GitHub usernames. As of now, we allow them to make upto 3 changes within a minute. This’d help in reducing any unseen spam.
const rateLimiter = ratelimit(3, "60 s");

if (rateLimiter) {
  const result = await rateLimiter.limit(context.sender.login);
  limit = result.limit;
  remaining = result.remaining;
  if (!result.success) {
    return {
      headers: {
        "X-RateLimit-Limit": limit,
        "X-RateLimit-Remaining": remaining,
      },
      body: JSON.stringify({
        message:
          "Too many updates in 1 minute. Please try again in a few minutes.",
      }),
    };
  }
}
Implementing stale-while-revalidate on the edge for all the user profiles
The following code describes how to use the concept of
Stale While Revalidate to improve cache hit rates.
In the code (in routes.js), the router.match function is used to match all the user profiles (that start with /me/).
Inside the cache method, we prevent caching the page in browser and enable only edge caching to always serve users fast and with the latest content.
The edge option is set to maxAgeSeconds: 1 to ensure that the data is cached for only a second.
The staleWhileRevalidateSeconds option is set to be a year to allow the data to be served directly from the cache while the cache is being refreshed.
// User path(s)
router.match("/me/:path", ({ cache, removeUpstreamResponseHeader }) => {
  // Remove the cache-control header from Astro's standalone server
  removeUpstreamResponseHeader("cache-control");
  // Disable in browser caching, and use Edgio's edge to use SWR
  cache({
    edge: {
      maxAgeSeconds: 1,
      staleWhileRevalidateSeconds: 60 * 60 * 24 * 365,
    },
    browser: false,
  });
});
Using Stale While Revalidate can help to improve the performance of the app by reducing the load on the server and providing faster responses to the user.
Creating dynamic user profiles on the fly
Astro makes it super easy to set up dynamic routes.
In the app, you'd find src/pages/me/[slug].astro, which maps pages that start with /me/.
Examples include /me/rishi-raj-jain and /me/some-other-user.
Fetching user profiles
We fetch the data for the current user by making use of the slug query parameter
extracted out of Astro params, and call the getUserInfo function (as described above)
to obtain all the related user data. In case of not found or an error, we redirect the visitor to a 404.
import { getUserInfo } from "@/lib/Upstash/users";

// Extract slug query
const { slug } = Astro.params;

// Get data from Upstash using the getUserInfo function
const {
  name: userName,
  image: userImage,
  links = [],
  socials = [],
  about = "",
  og = {},
  background = {},
  code = 1,
} = await getUserInfo(userSlug);

// In case the code: 0 is recevied, redirect to a 404
if (code === 0) {
  return Astro.redirect("/404");
}
Deploy from CLI
You can do a production build of your app and test it locally using:
yarn run edgio:build && yarn run edgio:productionDeploying requires an account on Edgio. Sign up here for free. Once you have an account, you can deploy to Edgio by running the following command in the root folder of your project:
yarn run edgio:deployNow we are done with the deployment! Yes, that was all.
Conclusion
In conclusion, this project has provided valuable experience in implementing granular rate limiting, CRUD data operations in serverless, use GitHub issues as CMS, and make the better decision to ship MVP by using a service that scales with your need, i.e. Upstash.
