Serverless Realtime Analytics for Next.js with Vercel Edge, Upstash Kafka and Tinybird
In this article, we will build an end to end pipeline to analyze our web site traffic on real time. At the end we will be able to query the traffic coming to our Next.js application. We will run a query like:
SELECT city, count() FROM page_views
where  timestamp > now() - INTERVAL 15 MINUTE group by city
Namely, we will query the number of page views from different cities in last 15 minutes. We keep the query and scenario intentionally simple to make the article easy to understand. But you can easily extend the model for your more complex scenarios.
Architecture
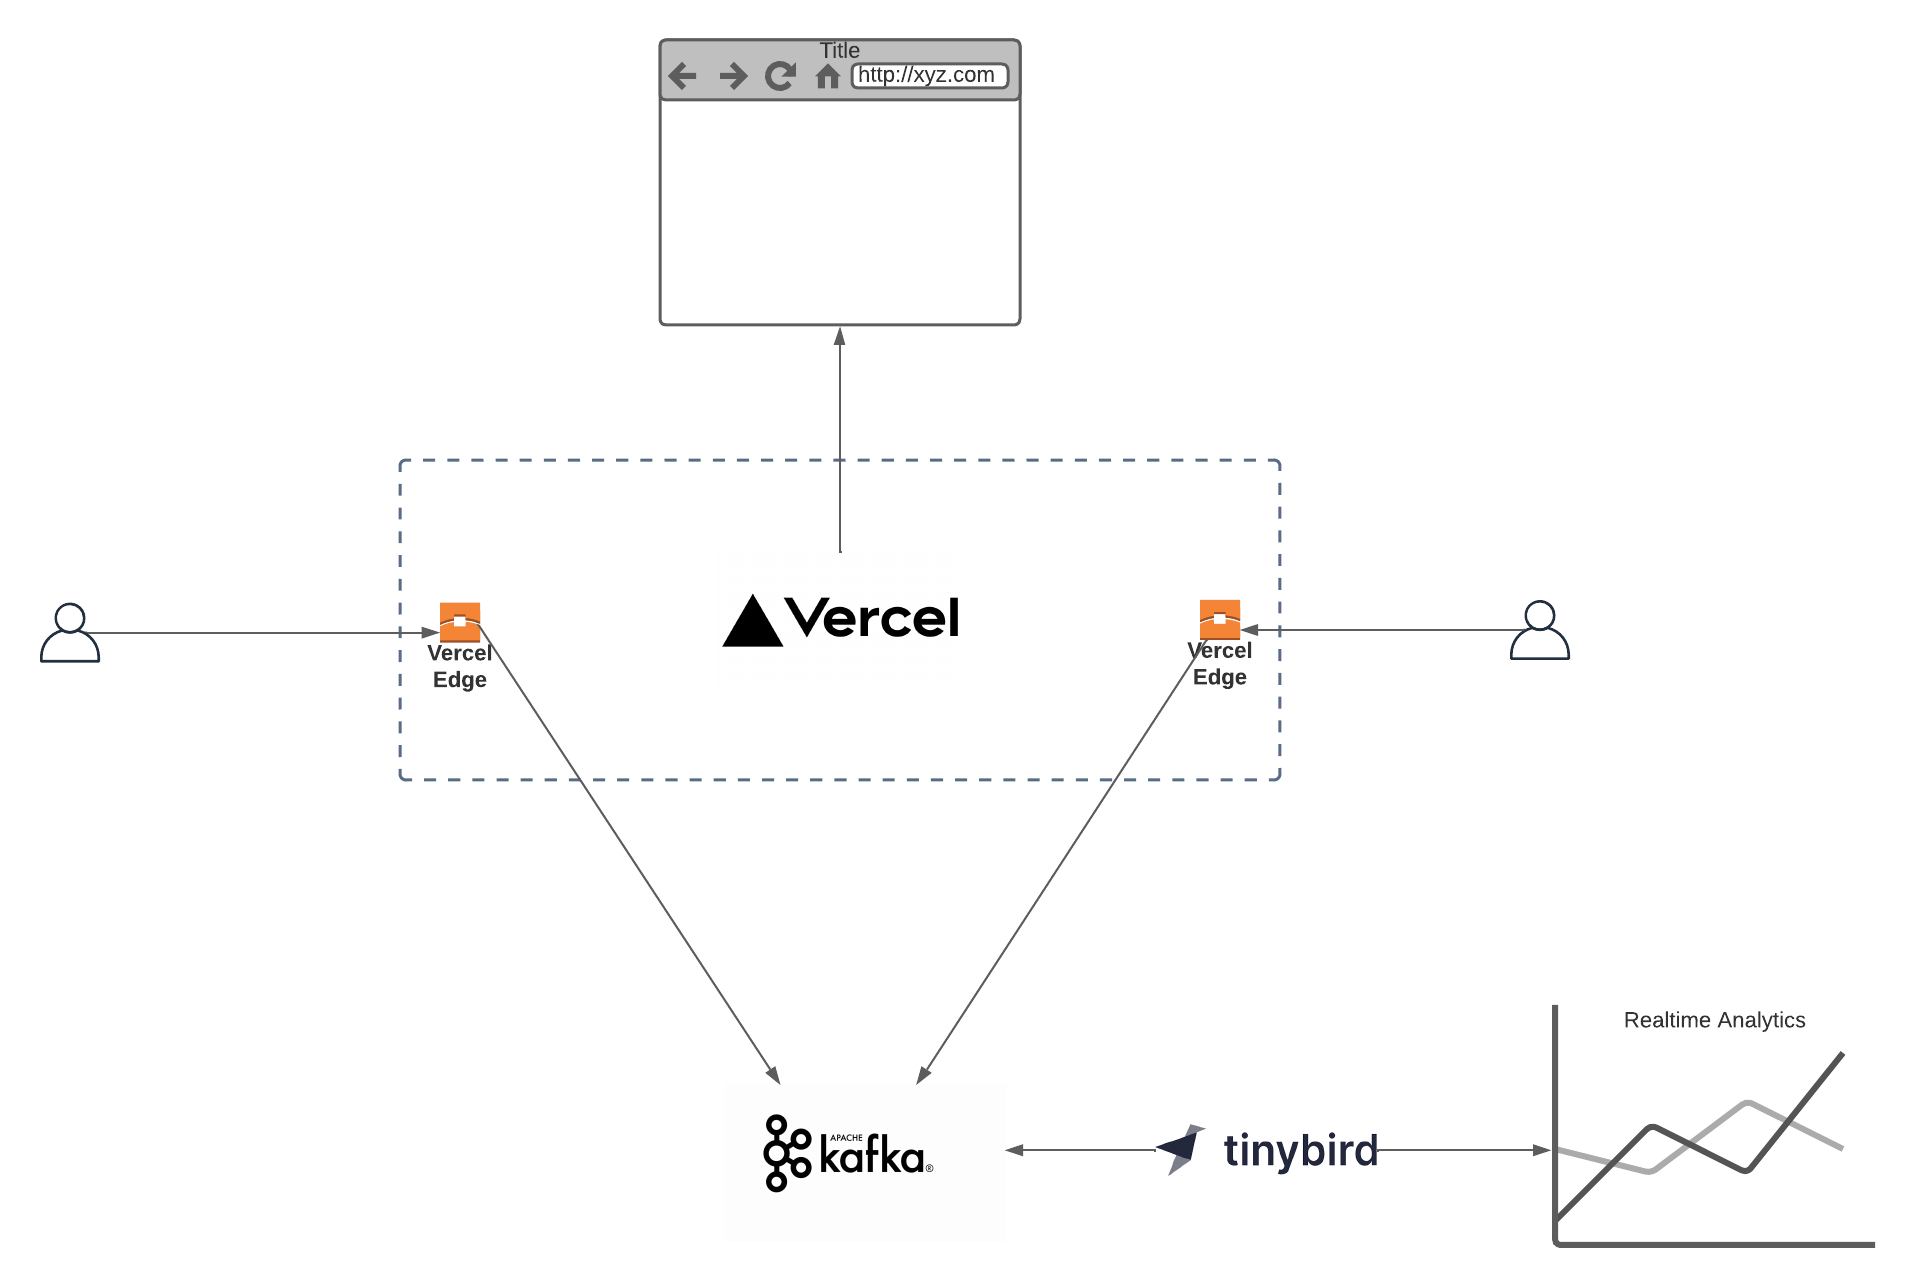
We will use Vercel Edge, Upstash Kafka and Tinybird. Now let’s talk about why we choose each of them.
Vercel Edge
Vercel Edge Middleware intercepts the requests coming to your Next.js application at the edge. You can collect user and geo-locational information to feed your analytics pipeline.
Upstash Kafka
Upstash Kafka is a serverless Kafka offering. Thanks to its built-in REST API, it can be accessed from Edge functions (Vercel Edge, Cloudflare Workers, Fastly)
Tinybird
Tinybird is a serverless analytical backend where you can run queries on Kafka topics on real time and create API endpoints on those queries.
Kafka Setup
Create an Upstash Kafka cluster, and a topic as explained here. You will use the url and credentials in next steps.
Next.js and Vercel Setup
Vercel Edge middleware allows you to intercept the requests to your application served by Vercel platform. We will create a simple Next.js application and send the traffic events to Upstash Kafka using the Vercel Edge functions.
Create a Next.js application:
npx create-next-app@latest --typescriptCreate a middleware.ts (or .js) file at the same level as your pages directory. Update the file as below:
import { NextResponse } from "next/server";
import type { NextFetchEvent, NextRequest } from "next/server";

import { Kafka } from "@upstash/kafka";

// Trigger this middleware to run on the `/secret-page` route
export const config = {
  matcher: "/",
};

export async function middleware(req: NextRequest, event: NextFetchEvent) {
  // Extract country. Default to US if not found.
  console.log(req.url);

  const kafka = new Kafka({
    url: "https://real-goldfish-14081-us1-rest-kafka.upstash.io",
    username: "ZGVmaW5453tZ29sZhgf65yzQy26tVXO_fm8Y",
    password: "v02ibEEtghfg56OybgOHwjmRdNS3nthrt=",
  });

  const message = {
    country: req.geo?.country,
    city: req.geo?.city,
    region: req.geo?.region,
    url: req.url,
    ip: req.headers.get("x-real-ip"),
    mobile: req.headers.get("sec-ch-ua-mobile"),
    platform: req.headers.get("sec-ch-ua-platform"),
    useragent: req.headers.get("user-agent"),
  };

  const p = kafka.producer();
  const topic = "mytopic";

  event.waitUntil(p.produce(topic, JSON.stringify(message)));

  // Rewrite to URL
  return NextResponse.next();
}
Replace url, username and password above. Also update the name of the topic.
Above, we simply parse the request object and send useful information to Kafka. You may add/remove information depending on your own requirements.
You can test the function locally with npm run dev. Deploy your function to Vercel with vercel --prod
The endpoint of the function will be printed. You can check if logs are collected in Kafka by copying the curl expression from the console:
curl https://real-goldfish-14081-us1-rest-kafka.upstash.io/consume/GROUP_NAME/GROUP_INSTANCE_NAME/mytopic -H "Kafka-Auto-Offset-Reset: earliest" -u \
  REPLACE_HERE
Tinybird Setup
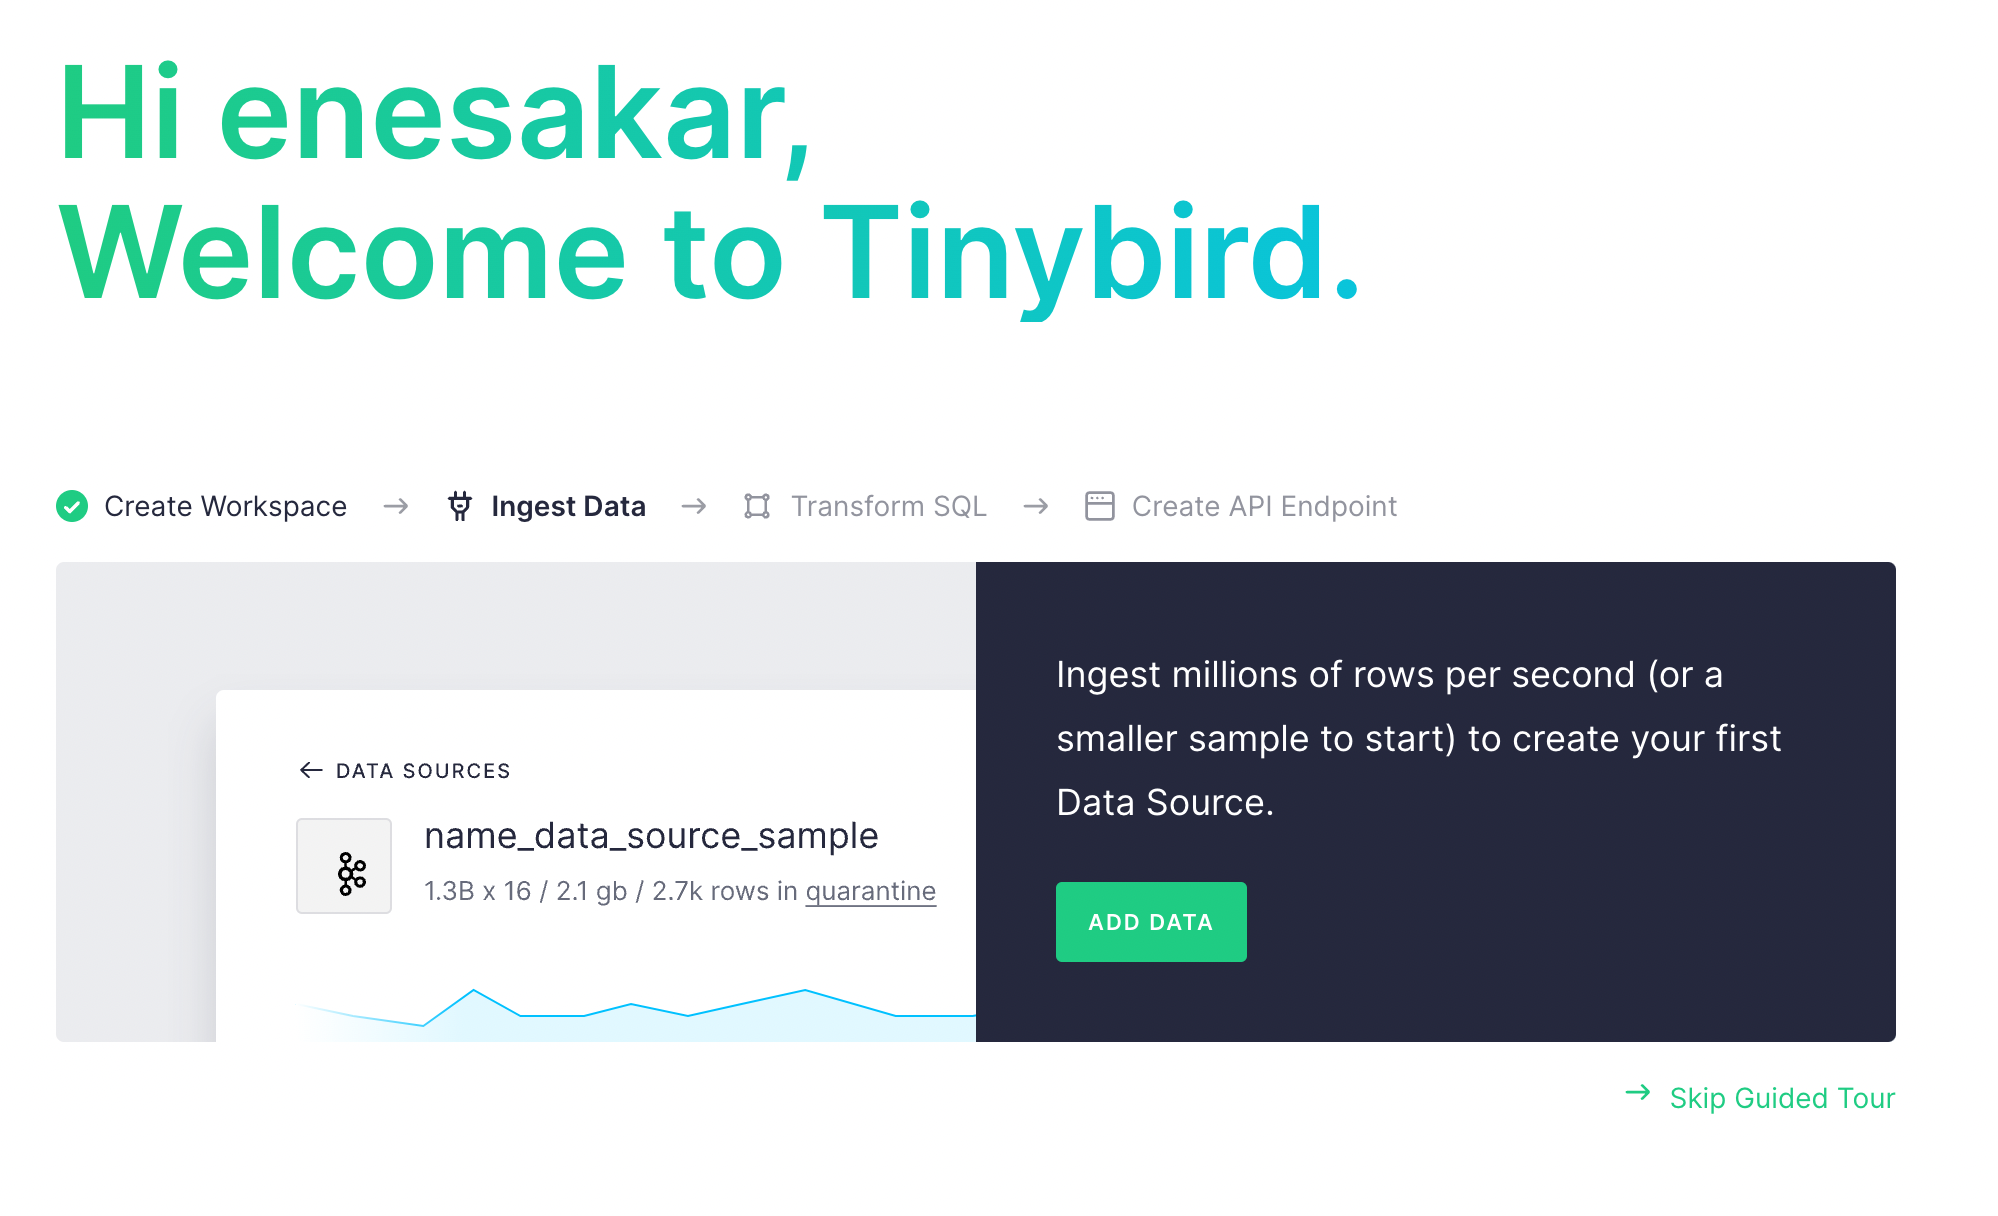
Create a Tinybird account and select a region. Create an empty workspace. On the wizard screen click Add Data button.
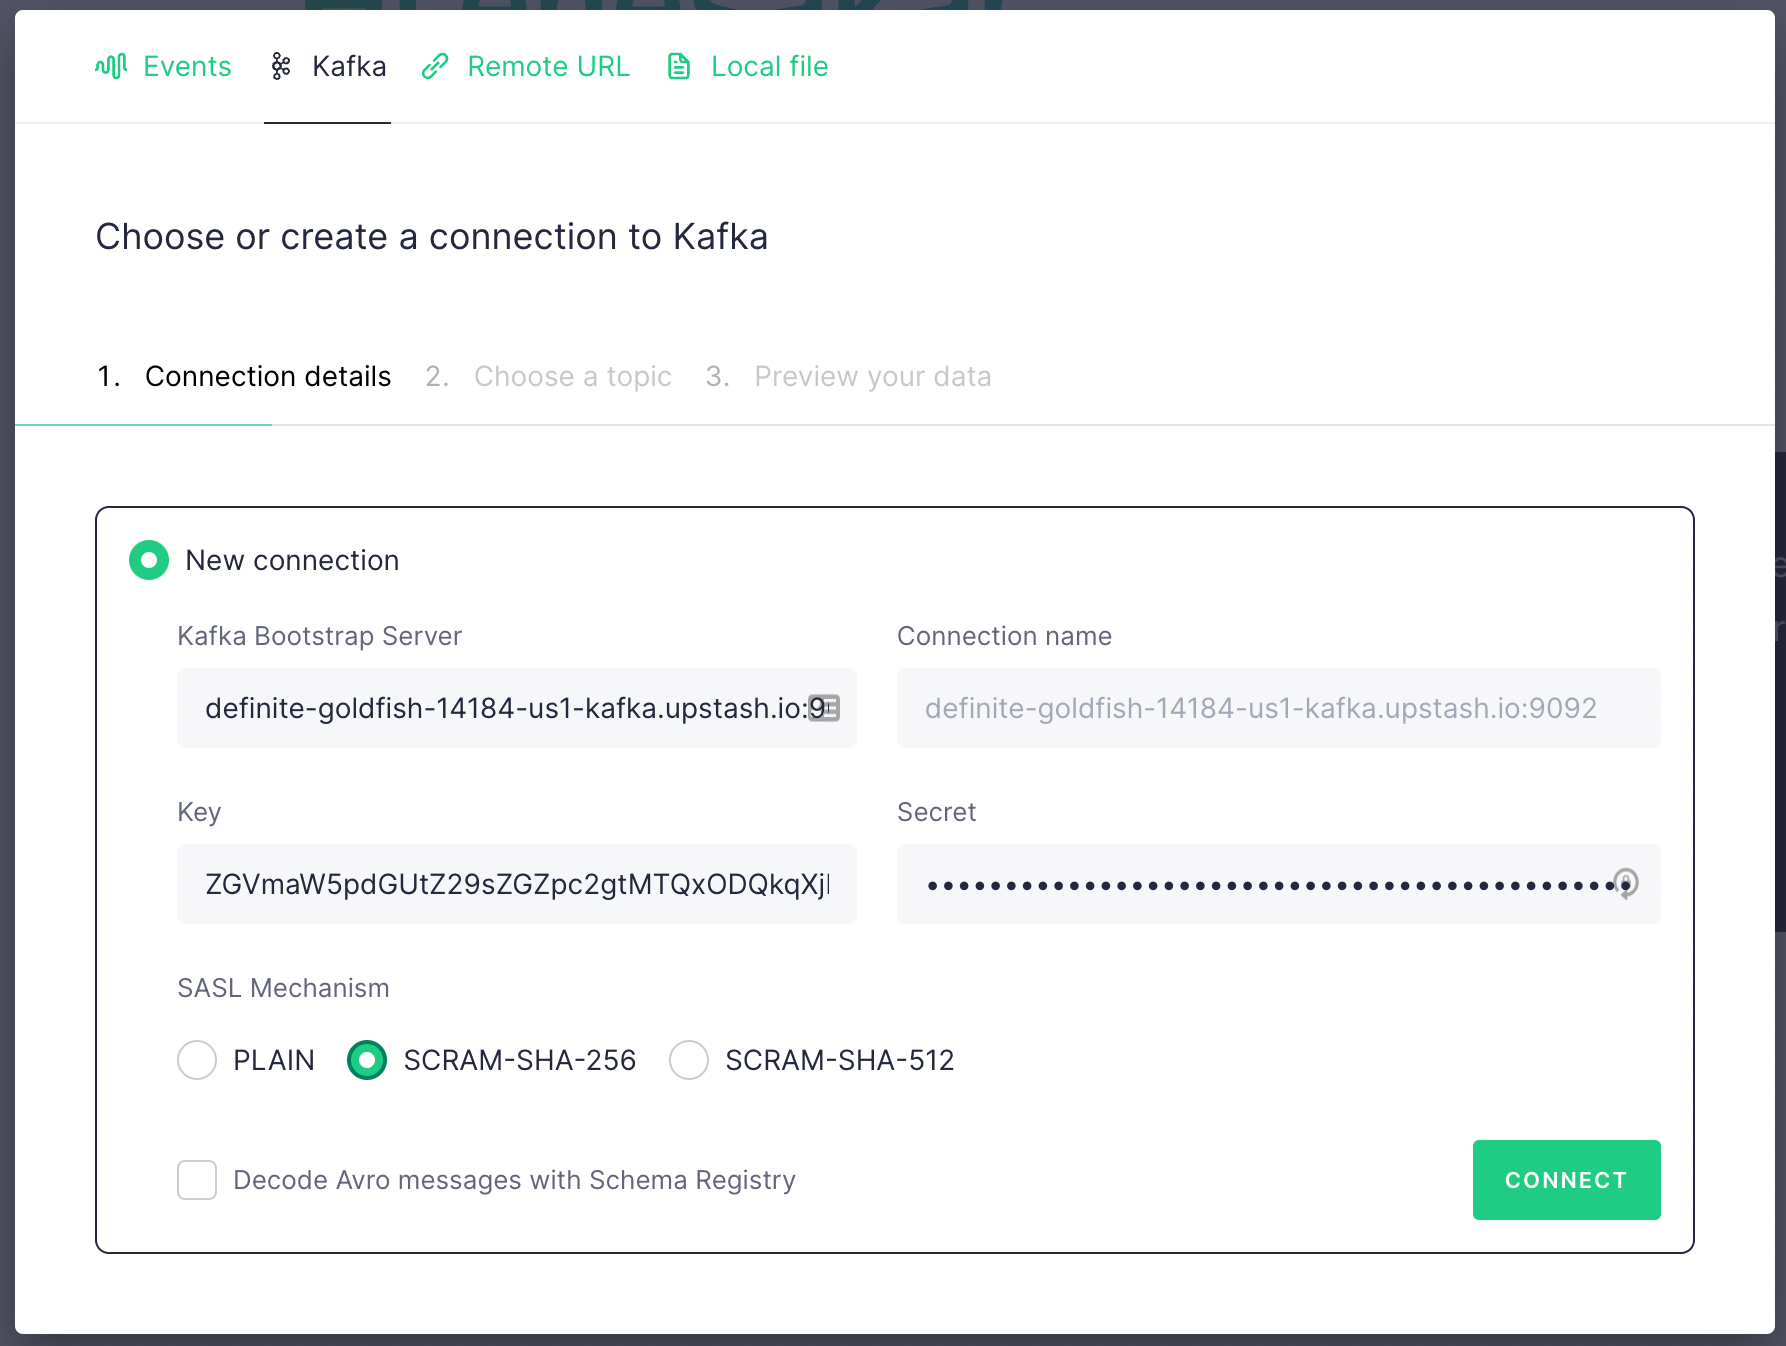
In the next screen click on Kafka tab and fill the fields with the credentials copied from Upstash Kafka console. Key is username , secret is password . Select SCRAM-SHA-256. Then click on Connect button.
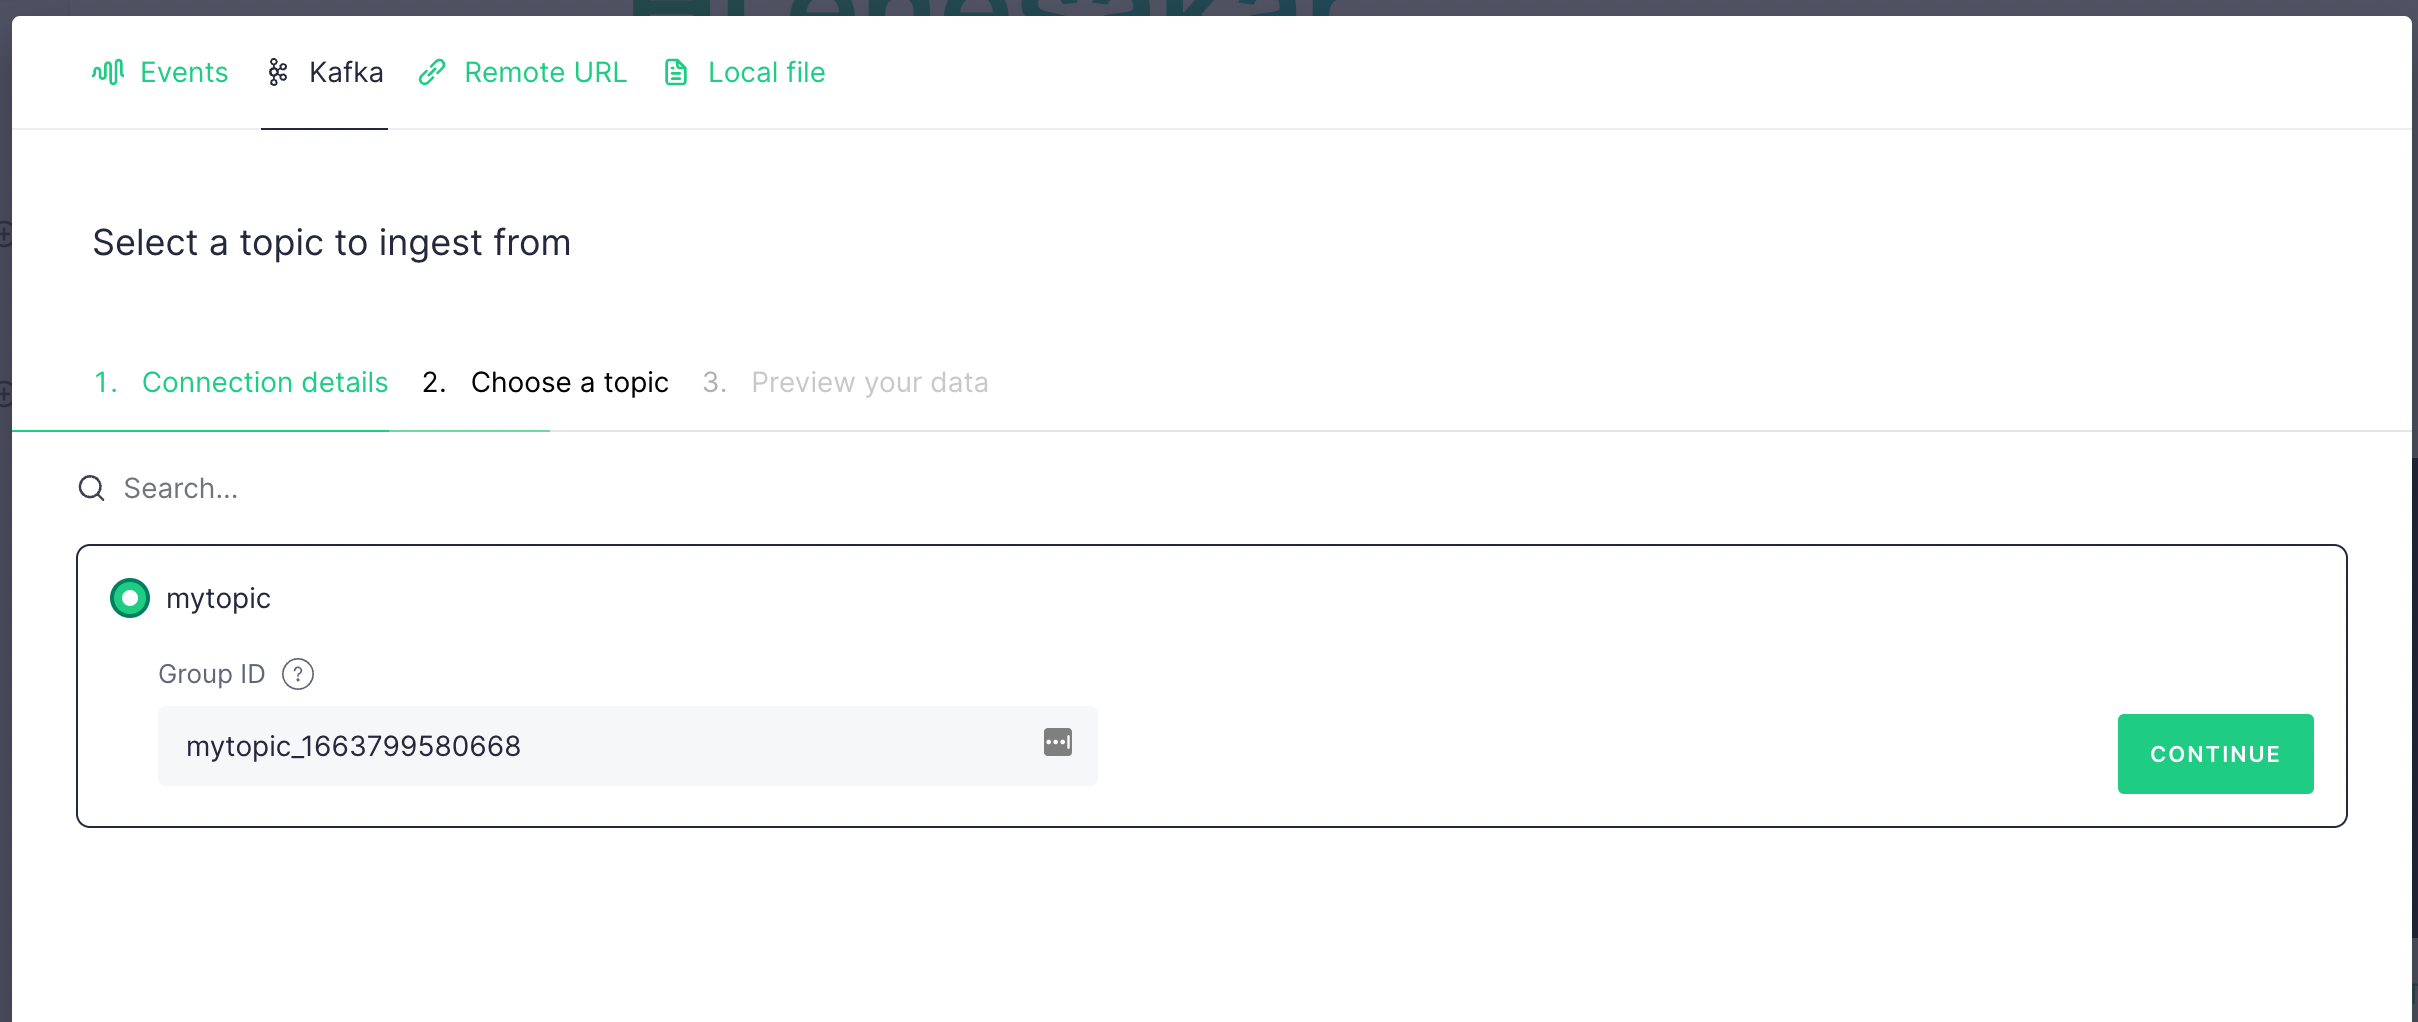
If the connection is successful, then you should see the topic you have just created. Select it and click Continue .
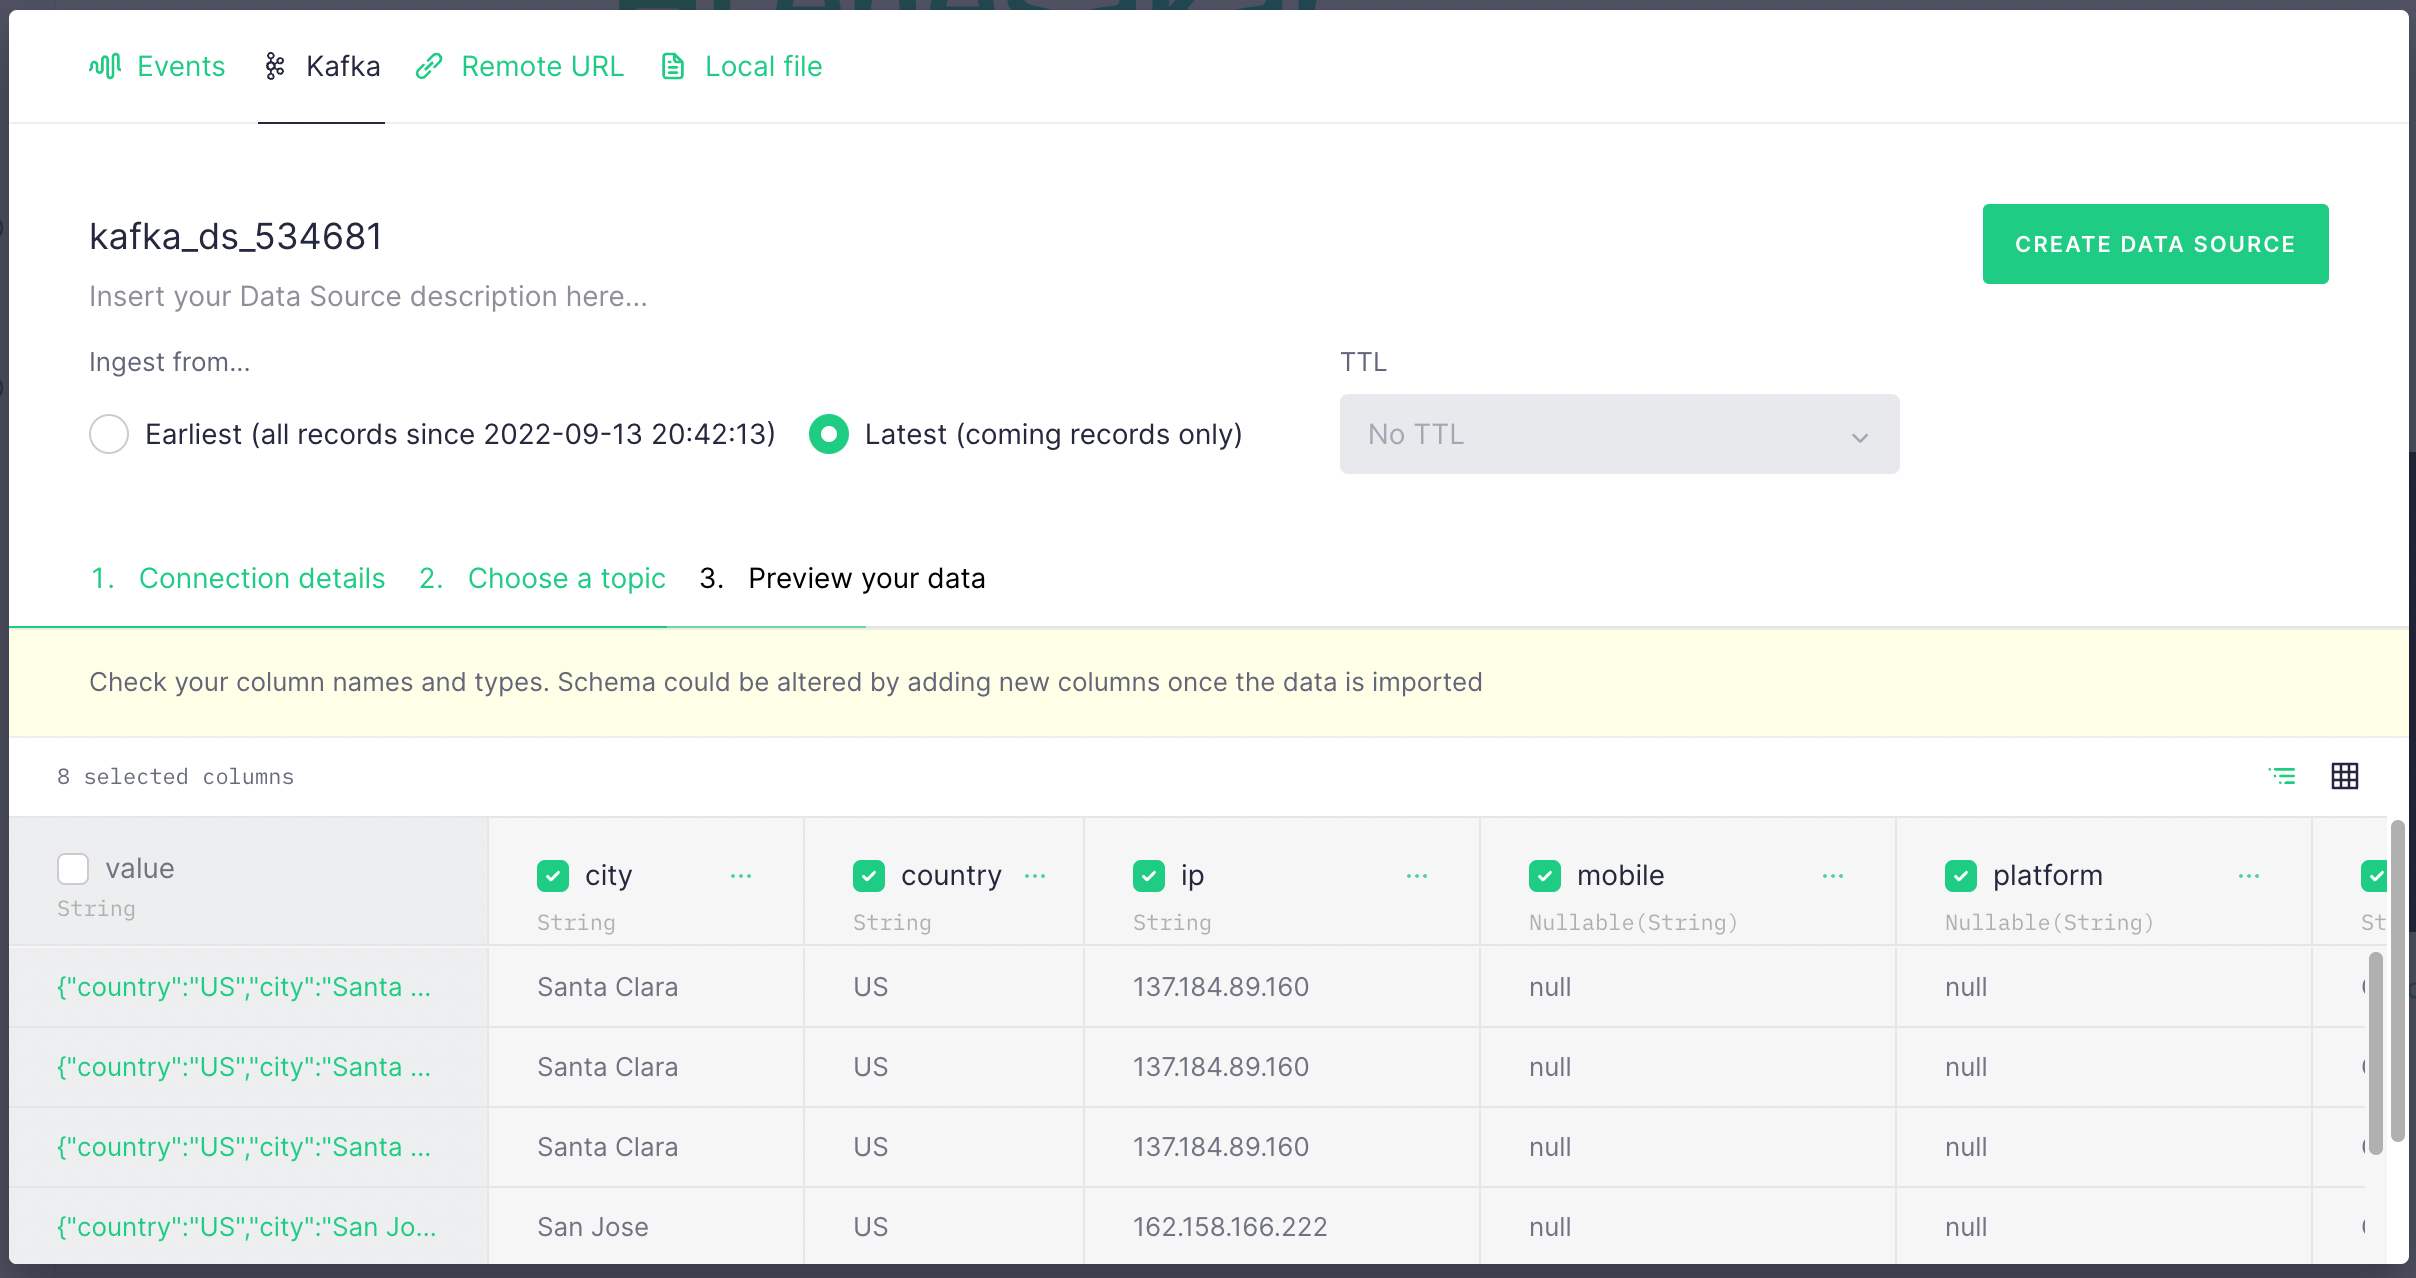
In the next screen, you should see data is populated from your Kafka topic. It should look like the below. Select Latest and click Create Data Source
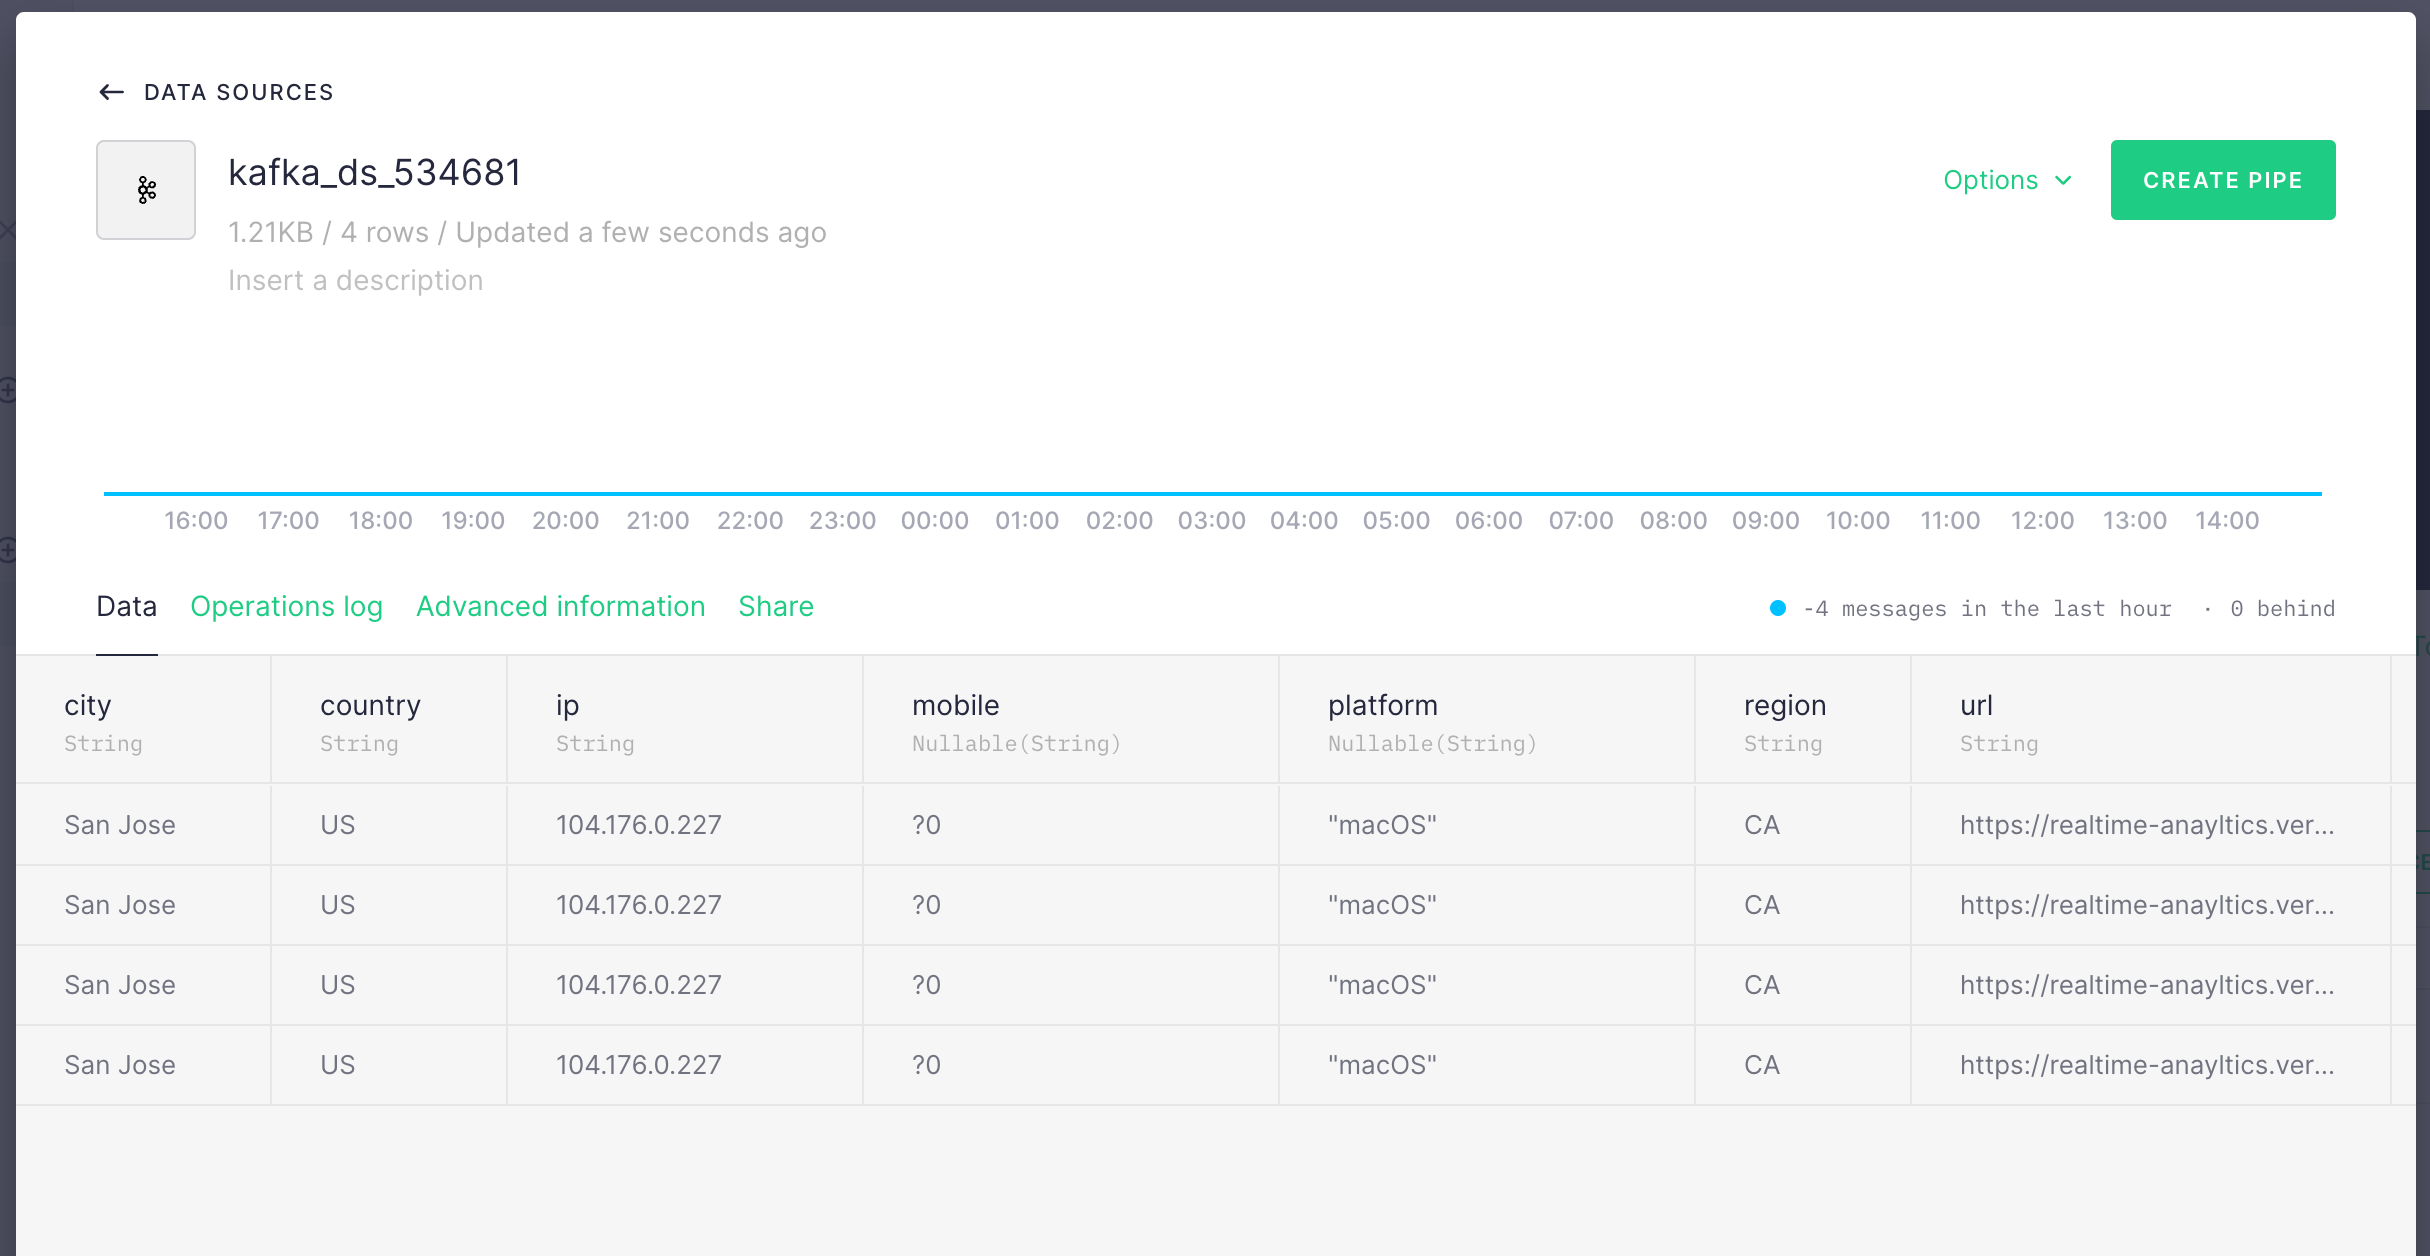
Click Create Pipe on the next screen.
In the next page, you will see the query editor where you can execute queries on your data pipe. You can rename the views. Update the query as (replace the datasource):
SELECT city, count() FROM kafka_ds_534681 where timestamp > now() - INTERVAL 15 MINUTE group by city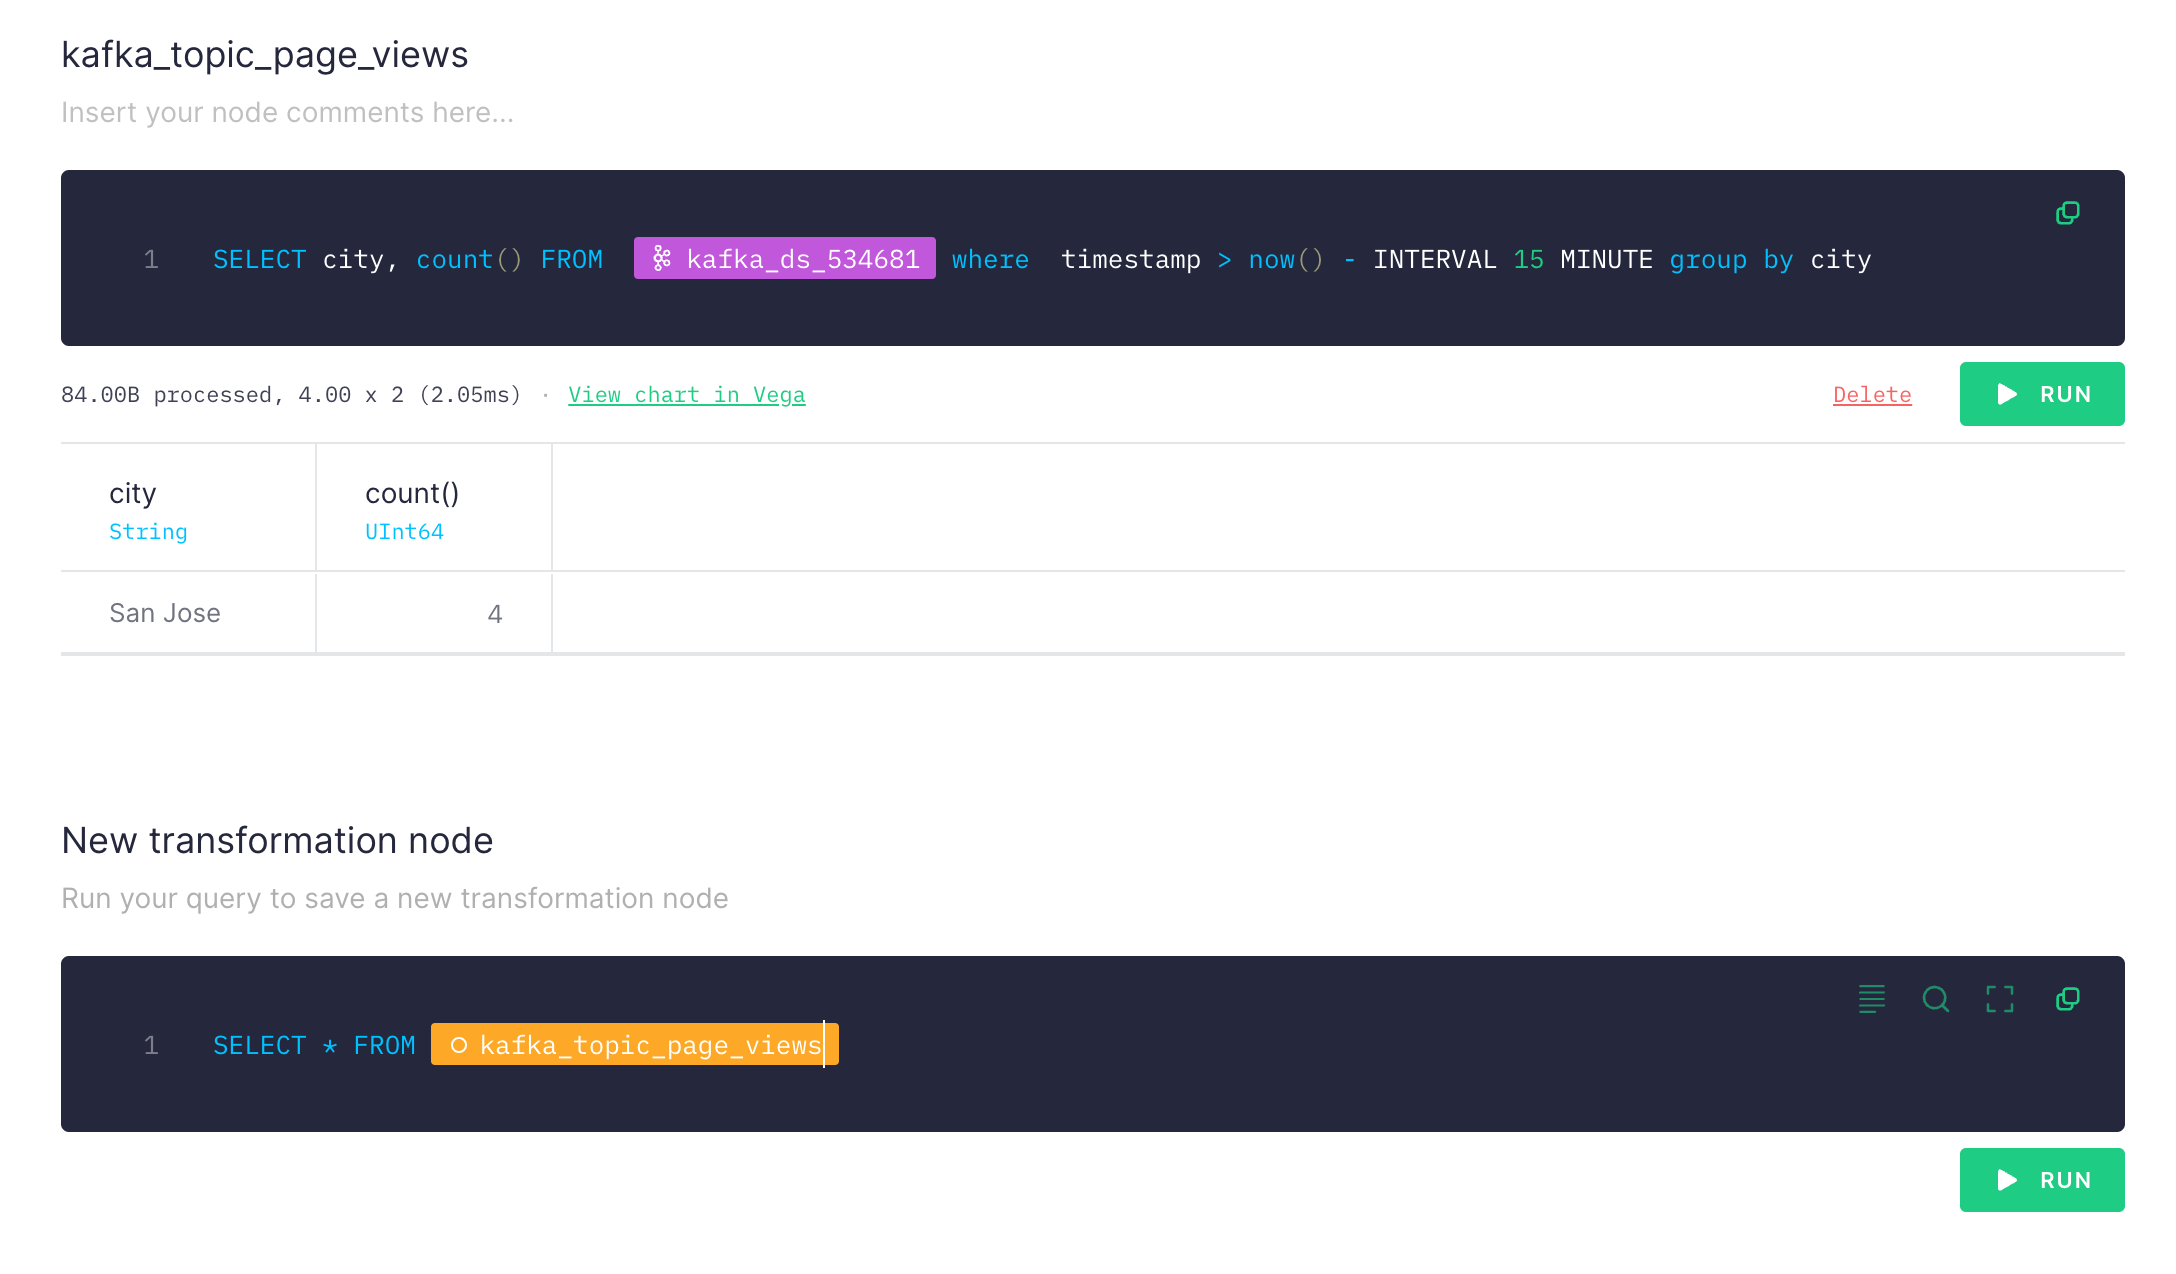
You should see the number of page view from cities in last 15 minutes. The good thing with TinyBird is you can chain queries (new transformation node) also you can add multiple data sources (e.g. Kafka topics) and join them in a single query.
If you are happy with your query, click on Create API Endpoint at top right. It will create an API endpoint which returns the result for your query.
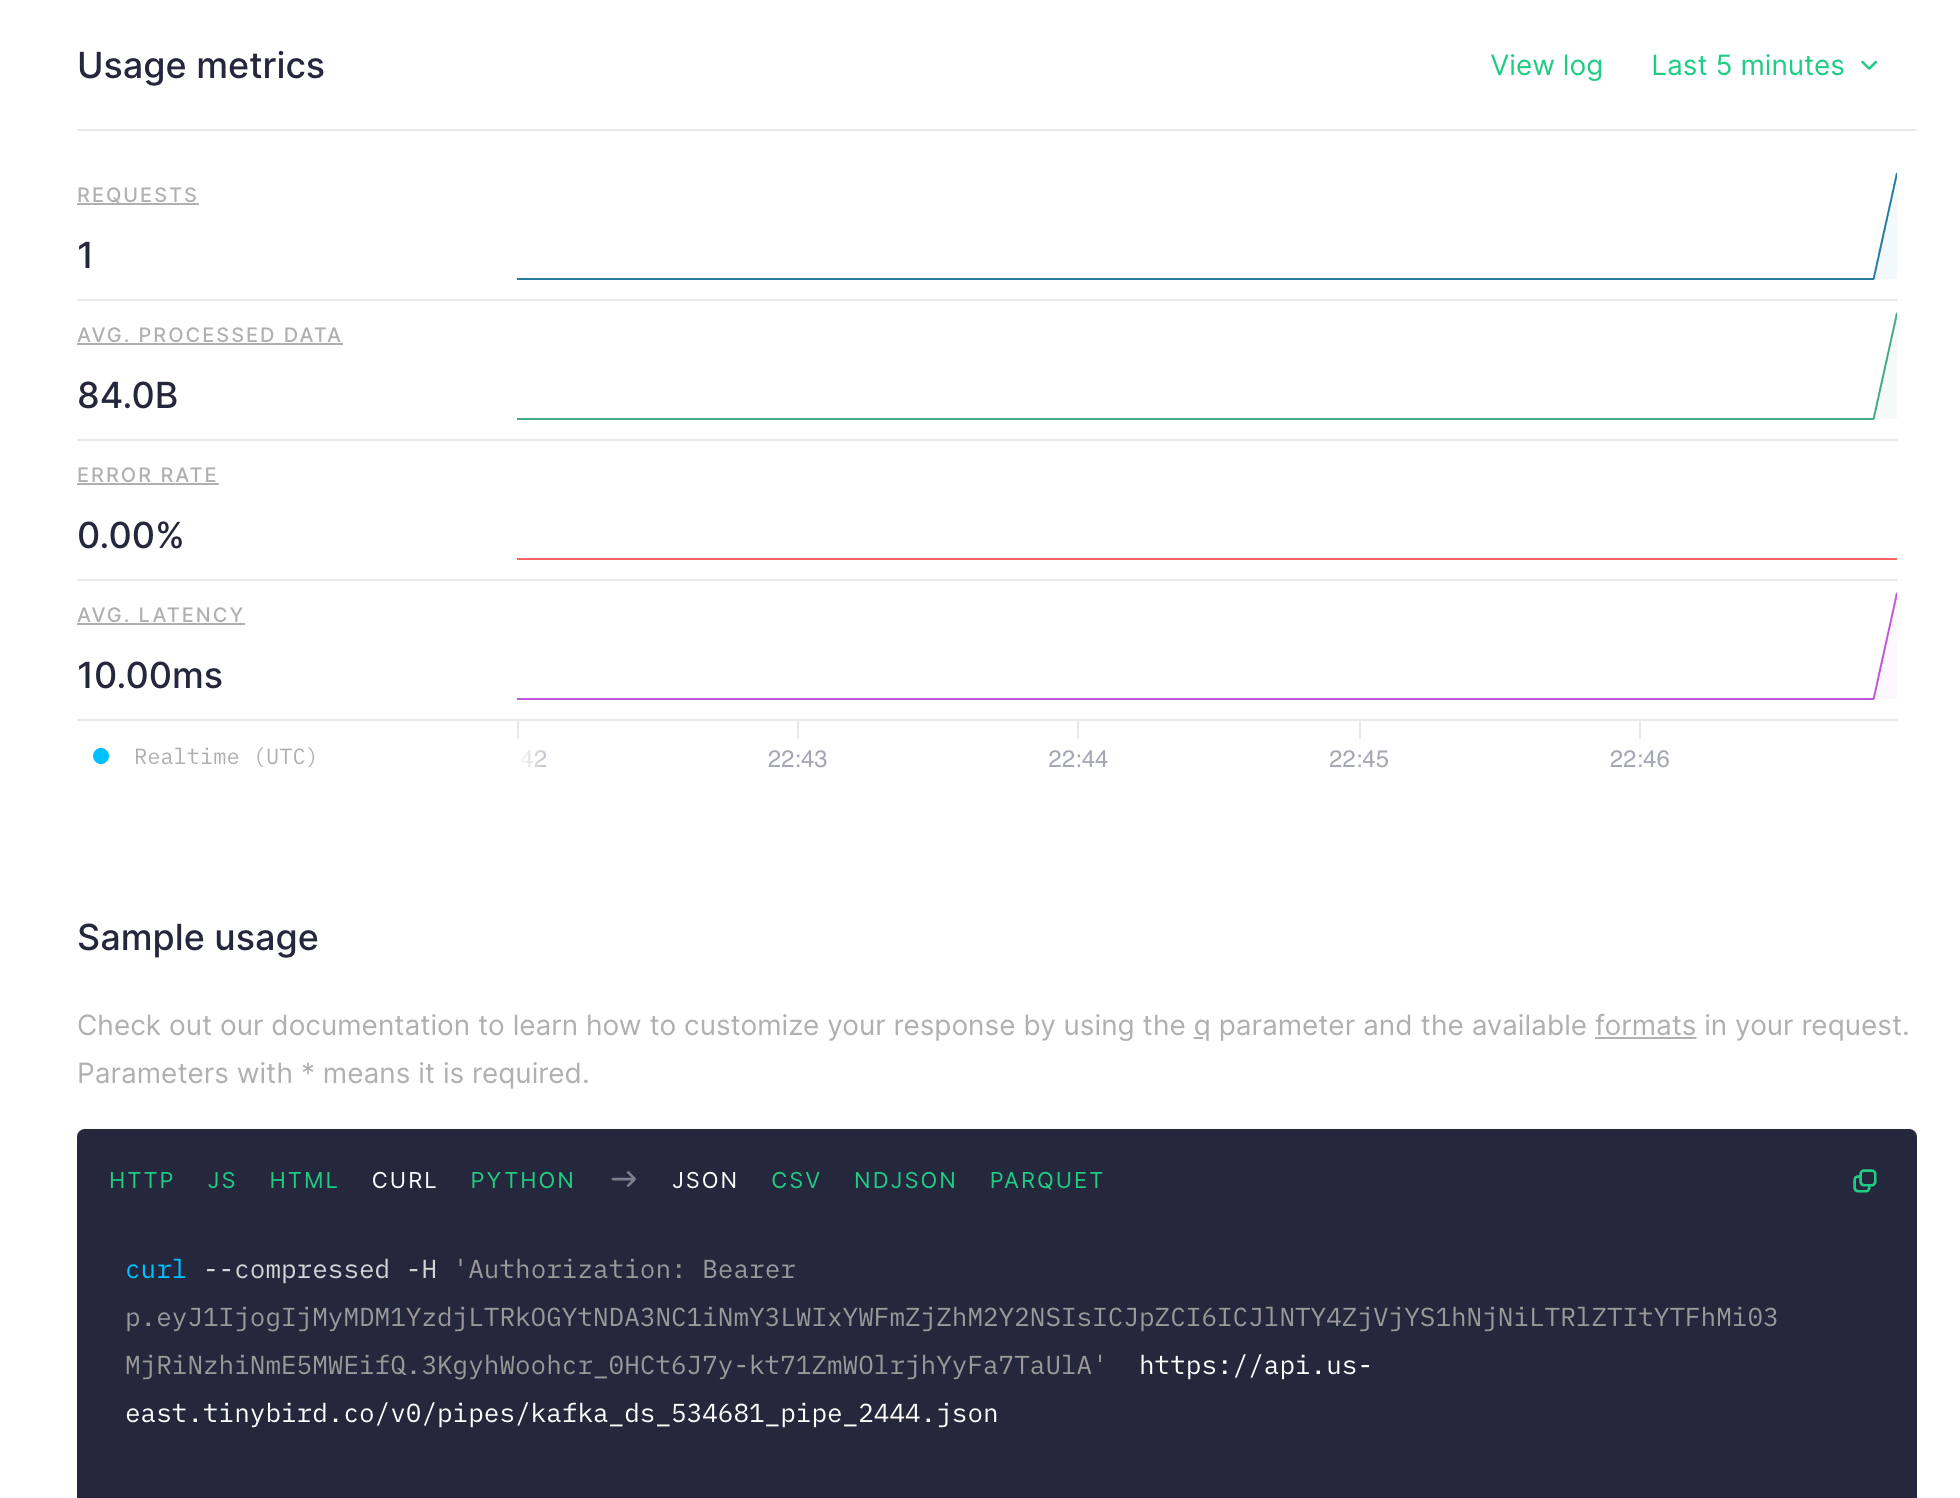
Copy the curl command and try, you should see the result like below:
curl --compressed -H 'Authorization: Bearer p.eyJ1IjogIjMyMDM1YzdjLTRkOGYtNDA3CJpZCI6ICJlNTY4ZjVjYS1hNjNiLTRlZTItYTFhMi03MjRiNzhiNmE5MWEifQ.3KgyhWoohcr_0HCt6J7y-kt71ZmWOlrjhYyFa7TaUlA'  https://api.us-east.tinybird.co/v0/pipes/kafka_ds_534681_pipe_2444.json
{
	"meta":
	[
		{
			"name": "city",
			"type": "String"
		},
		{
			"name": "count()",
			"type": "UInt64"
		}
	],

	"data":
	[
		{
			"city": "San Jose",
			"count()": 8
		}
	],

	"rows": 1,

	"statistics":
	{
		"elapsed": 0.000562736,
		"rows_read": 8,
		"bytes_read": 168
	}
}
Conclusion
We have built a simple data pipeline which collect data from edge to Kafka then create real time reports using SQL. Thanks to serverless technologies (Vercel, Upstash, Tinybird), we achieved this without dealing any server or infrastructural configurations. You can easily extend and adapt this example for much more complex architectures and queries.
